

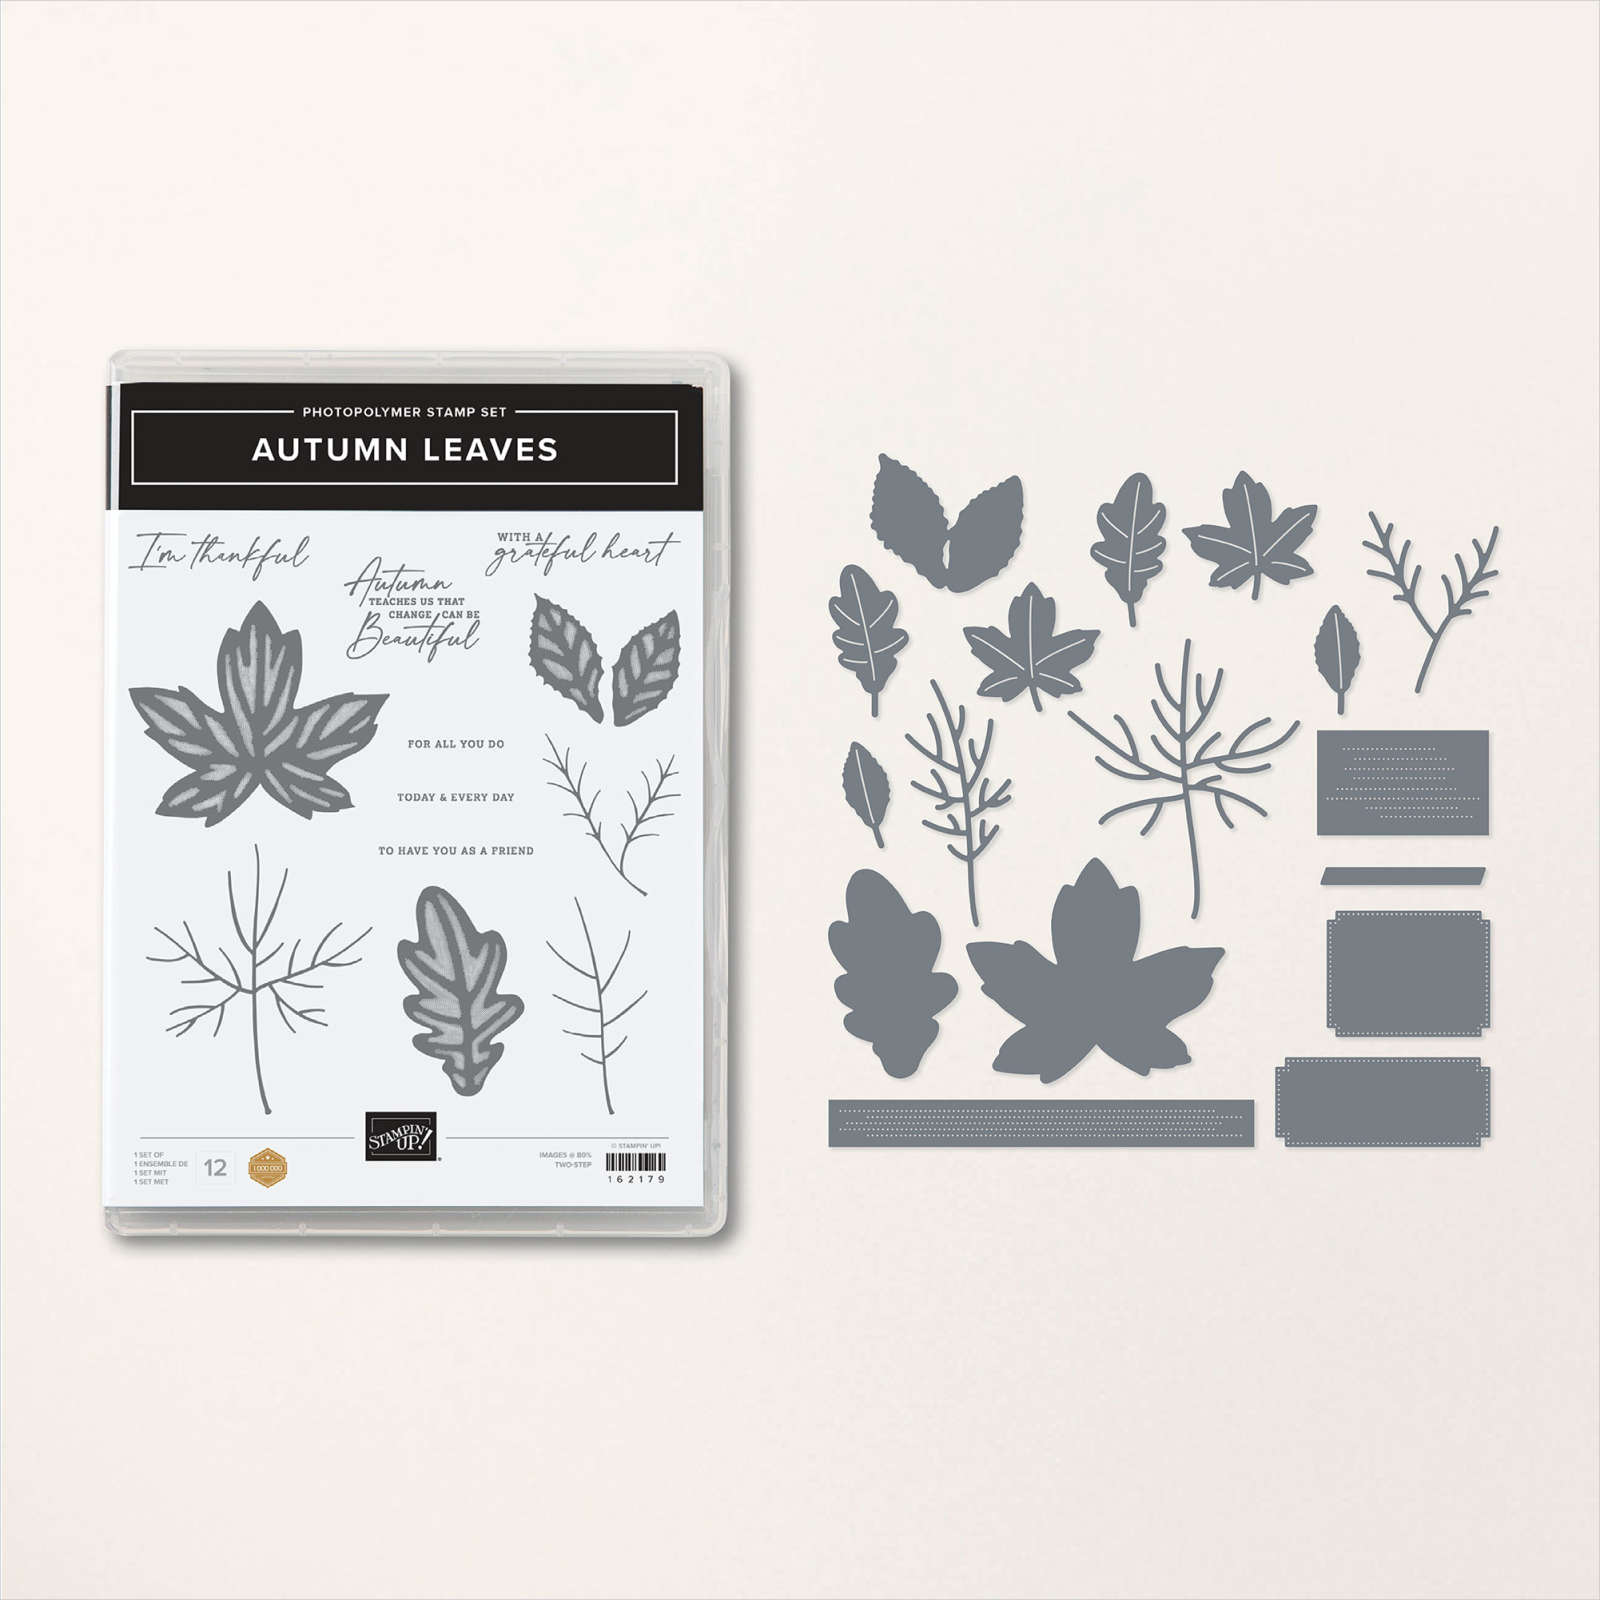
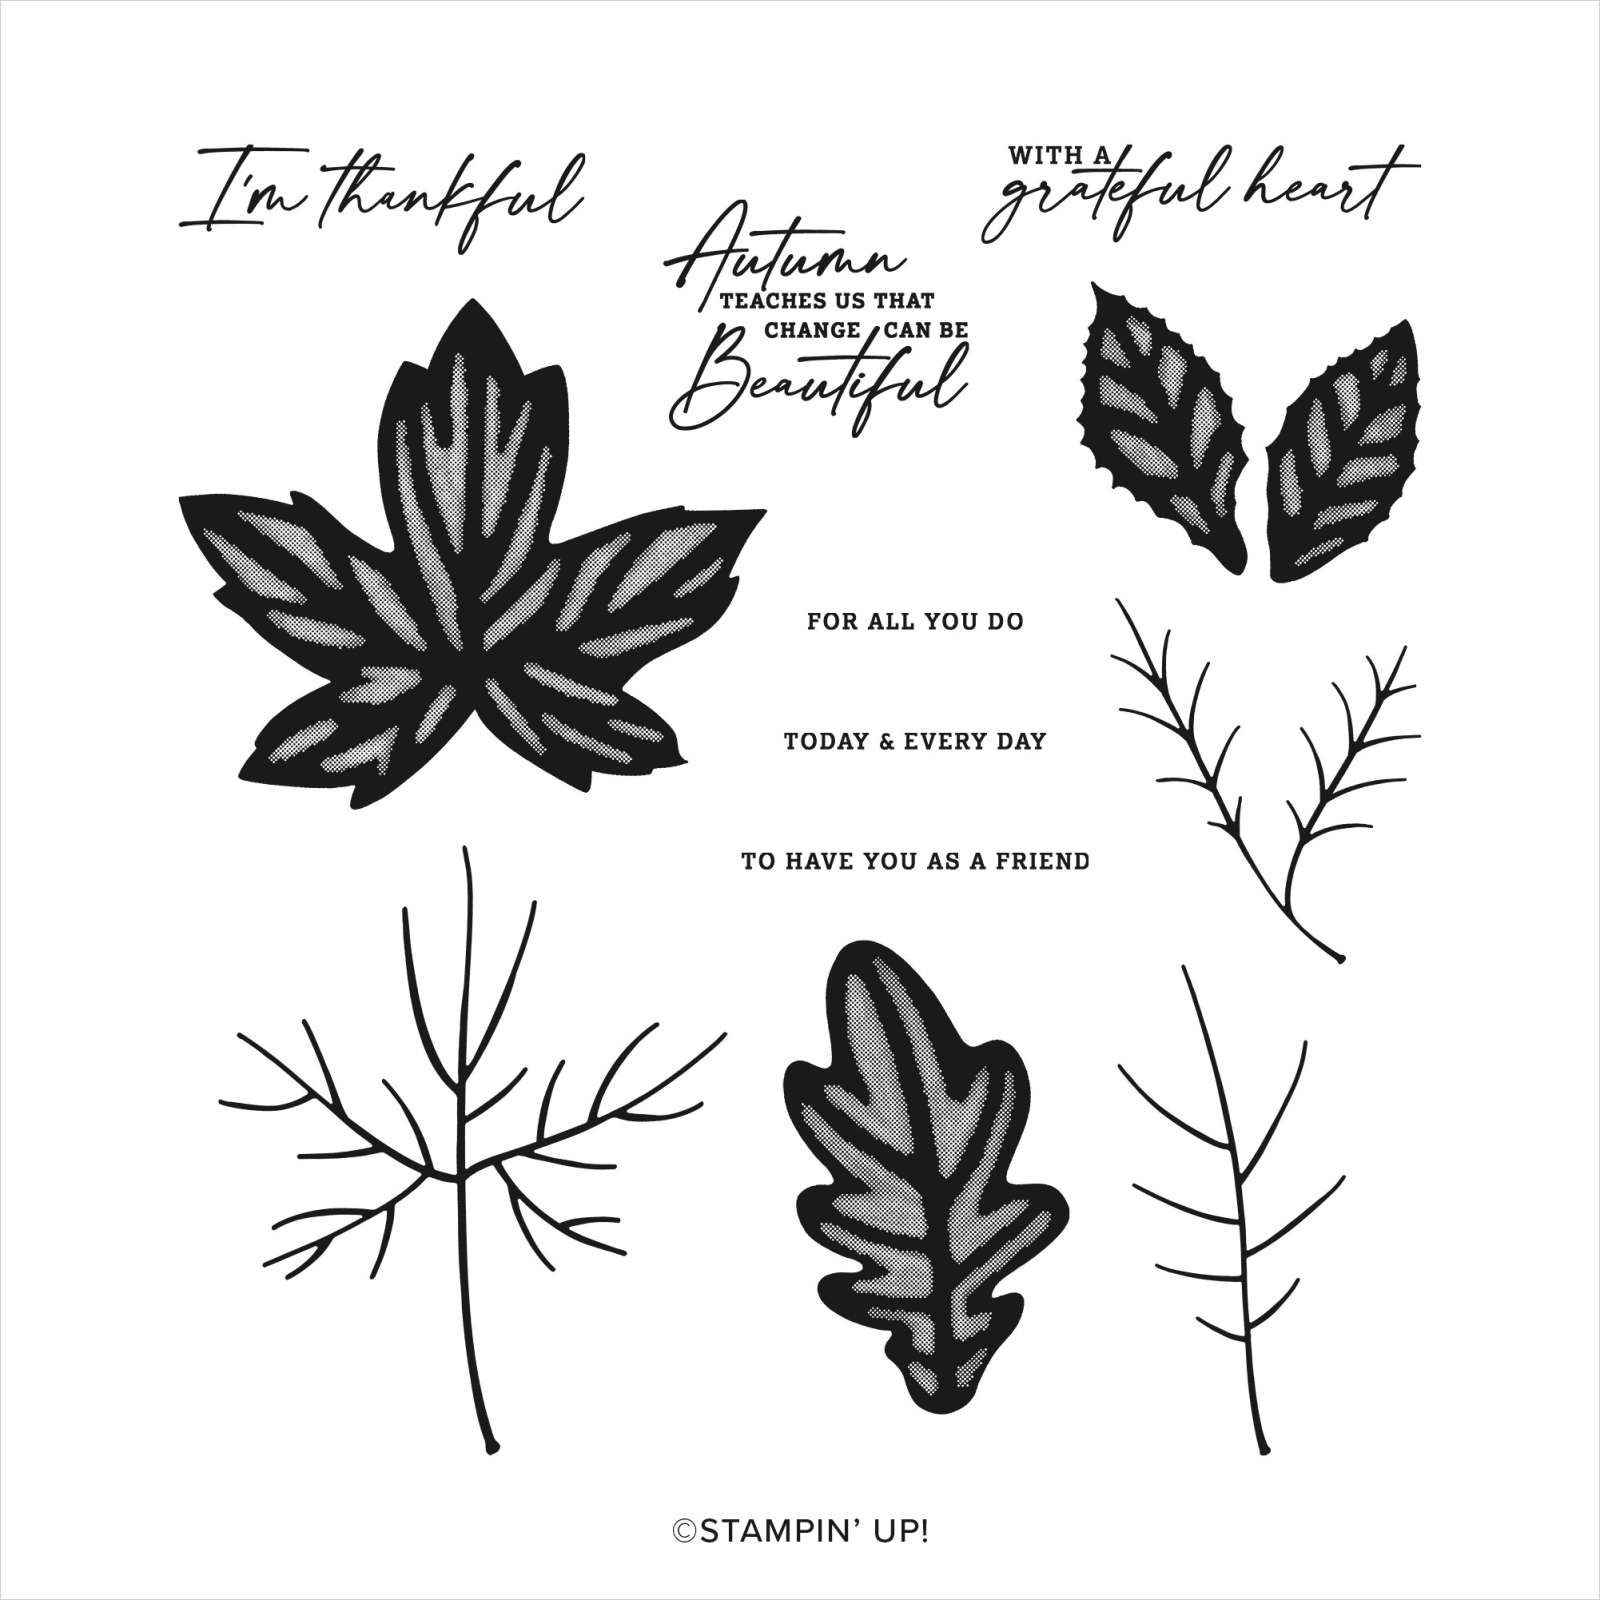
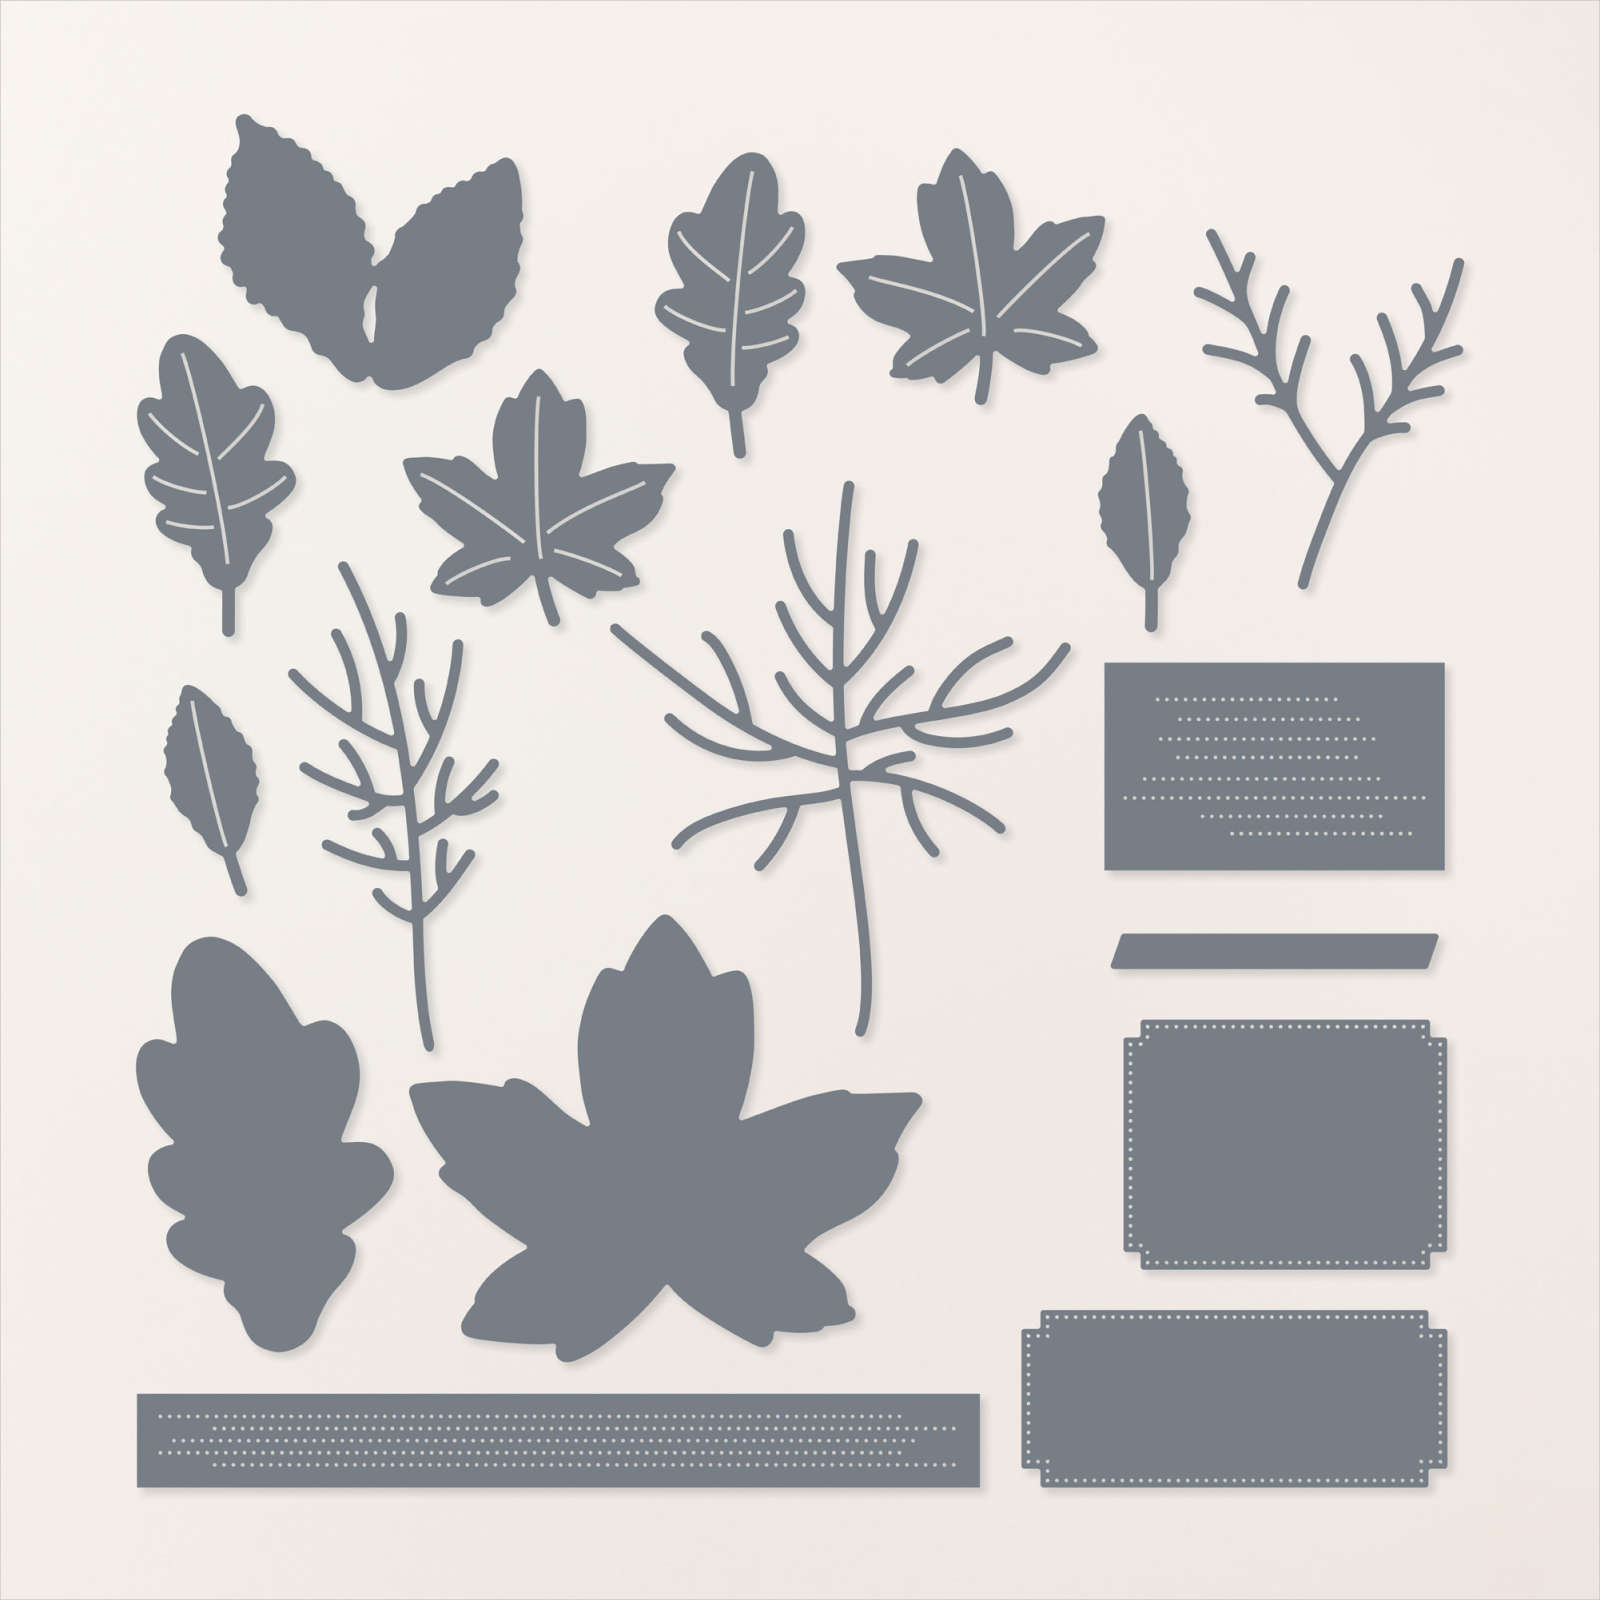
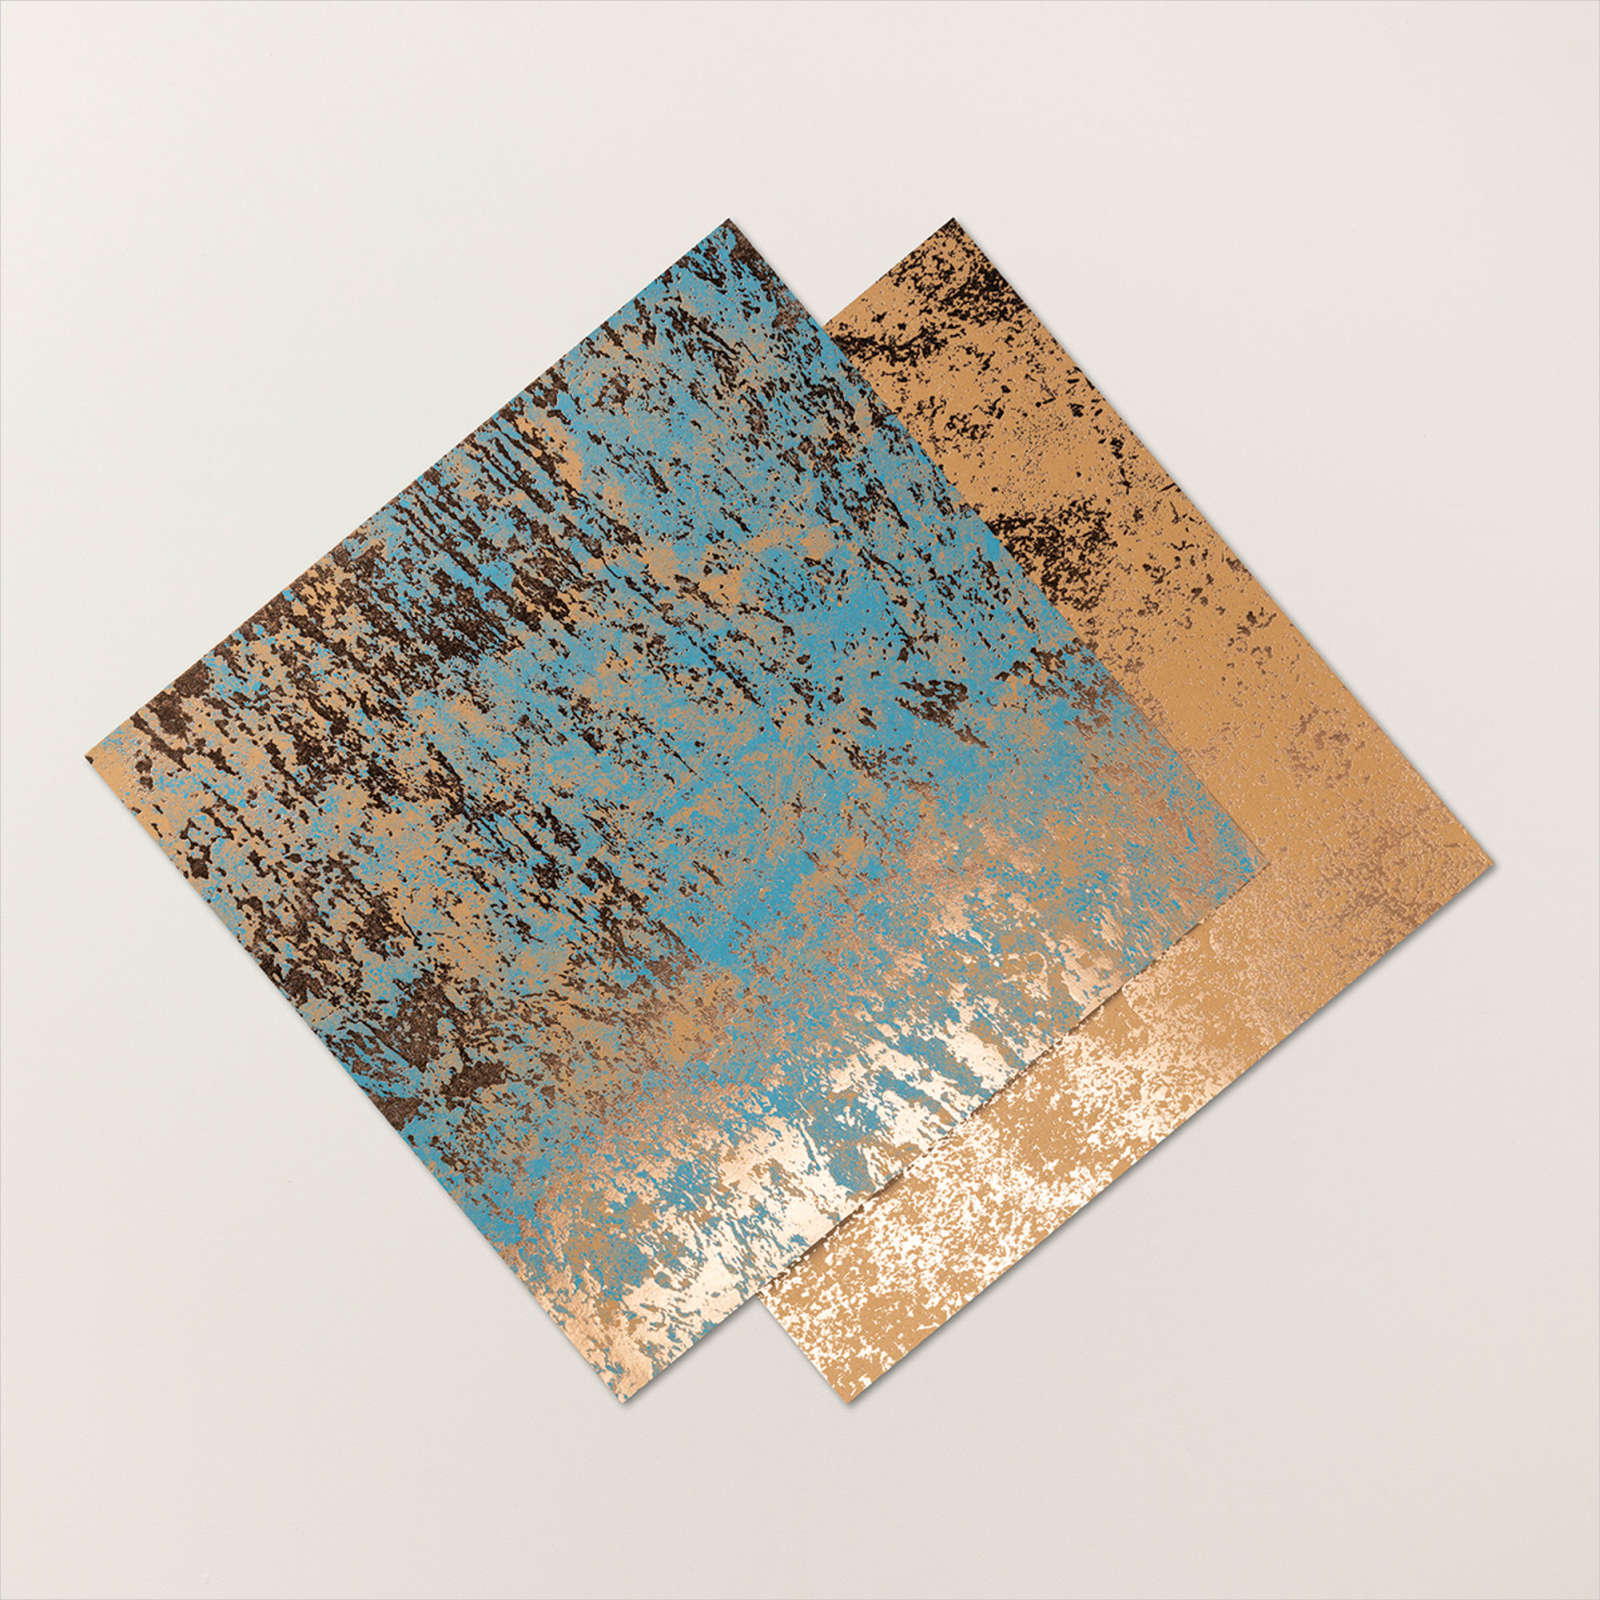
One of my favorite suites in the September – December Mini Catalog is the All About Autumn Sweet (#162193 $105.75 USD). Fall is my favorite season so it’s no surprise I was drawn to this suite. It features the Autumn Leaves stamp set, matching dies, copper and natural ribbon combo pack, Distressed Tile 3D embossing folder, Oxidized Copper 12 x 12 Designer Series Paper and All About Autumn 6 x 6 Designer Series Paper (all products can be purchased separately).
I had so much fun creating with this suite, and this is one card that gets a lot of compliments.

I used Pretty Peacock for the card base with the same color panel embossed with the Distressed TIle 3D embossing file. To get the emphasize the distressed look of the embossed panel I used Metallic Copper Enamel Effects. It really brings out the copper in the leaf and veins.
I attached the panel to the main card with dimensionals to make it pop a bit. Then from the Distressed Oxidized Copper DSP I cut one large leaf and two mall leaves and the veins from the Pretty Peacock and Copper DSP. After attaching the veins with mono glue I added it to the card front again with dimensionals. The saying “Autumn teaches us that change can be beautiful” was stamped on Very Vanilla cardstock using Pretty Peacock ink, then cut out using the frame in the Autumn Leaves dies. To add a little sparkle I used 2023 – 2025 In Color Dots on the saying.

For the inside I stamped “I’m Thankful” on Very Vanilla using Pretty Peacock. I added the two remaining leaves to tie it all together.
Cutting Directions:
- Pretty Peacock card stock – cut 5 1/2″ x 8 1/2″, score at 4 1/4″
- Pretty Peacock card stock – cut 4″ x 5 1/4″
- Very Vanilla – cut 4″ x 5 1/4″
- Copper Oxidized DSP – cut 3 1/4″ x 5″ (the large leaf and two small leaves can fit on this piece)
- Pretty Peacock & Copper Oxidized DSP – cut 3″ x 4″
- Scrap piece Very Vanilla at least 1 1/2″ x 2″
Supplies Used:


Please let me know any questions you may have!
Happy Stamping!
Joanne
~making the world a happier place one card at a time
Email: joanne@stamptilyoudrop.com
Share this:

Oh Bee-Hive!

One of my favorite sets in the 2020 January – June Mini Catalog is Honey Bee. It coordinates with the Detailed Bees dies and will be one of the sets retiring on June 2, 2020. The Golden Honey DSP was a Sale-A-Bration gift at the $50 level and is no longer available but there is still a way to receive a pack of this gorgeous paper. See the contest below for all the details!
I didn’t stamp too much on this card because I wanted the detail in the DSP to showcase the card. Also I didn’t use the dies so it is perfect for a beginning or casual stamper. To step it up you could die cut the bee on the front and attach with dimensionals to give it some depth.

For the card base I didn’t use a full piece of cardstock. When closed it gives the illusion of a full card but when you open the flap you have the greeting hiding behind the bee and another layer of DSP with ribbon so the inside is as pretty as the front.

Card Dimensions:
- Basic Black cardstock – 5 1/2″ x 6 3/8″, score at 4 1/4″
- Whisper White cardstock 2 1/2″ x 2 1/2″ – cut two
- Gold Foil – 2″ x 5 3/8″ and 2 5/8″ x 2 5/8″
- Black Foil – 2 5/8″ x 2 5/8″
- Black & Gold Honeycomb DSP 1 7/8″ x 5 1/4″
- Bee and flower DSP 4″ x 5 1/4″
- Gold metallic-edge ribbon 5″
Directions:
- Stamp the bee on a small Whisper White square using Black Stazon ink with the greeting above. Color the bee body with a Crushed Curry Stampin’ Write marker. Add some shimmer to the wings with Wink of Stella.
- Stamp the flowers on the other Whisper White square again using the Stazon ink. Color with the Crushed Curry marker.
- To create the coordinating black ribbon, lay the ribbon on your grid paper, place a sheet of cardboard behind it. Taking a Basic Black blend color the Gold Edged ribbon, set aside to dry. Since the Blends are alcohol based they dry pretty quick. This works for any light colored ribbon, using this technique you can always have ribbon to match your projects!
- Attach the honeycomb DSP to the gold foil panel and then place on the flap on the left of the card front
- Attach the bee panel to the gold foil square then attach to the flap in the center as shown, taking care to only put adhesive on the RIGHT side. That way the card will open.
- Wrap the ribbon around the bee and floral DSP attaching to the panel in the back. Attach entire panel to the inside of the card.
- Adhere the inside greeting to the black foil square then to the center of the card, making sure the outer greeting completely covers this panel. This will hide the “surprise” for the recipient.
Try using the ribbon technique and fold with other stamp sets and Designer Series Paper, I would love to see what you come up with! Send me your creations and I will display them in my customer gallery!
Supplies Used:


Additional Supplies:


How to win a package of the Golden Honey DSP
- purchase the Honey Bee Bundle or the Honey Bee Stamp Set and
- use Hostess code DJPSQ474 when placing your order and
- you will be placed into a drawing to win a package of Golden Honey DSP!
BONUS: When using the Hostess Code DJPQ474 and placing an order $35 or more you will receive a DSP sampler pack as a free gift as a thank you for supporting my business!
The winner will be announced on June 3rd and the DSP pack will be shipped to the address on your order. Be sure to place your order soon, retiring products are only available until June 2, 2020 or while supplies last.

SHOP WITH JO
If you have any questions on the project featured, please let me know. I would be happy to help!
Happy stamping!
Jo
~Making the world a happier place, one card at a time
Share this:

Snowflake Card Using the Stamp-A-Ma-Jig
Today’s share feature’s another holiday card in Elegant Eggplant and using supplies from the 2016-2017 Annual Catalog. Several techniques and tools are used on this card; a double image technique for the snowflake, sponging and the stamp-a-ma-jig for perfect placement of the words. As you know I love a little “something” on all my cards so I used Dazzling Diamonds Glimmer paper as a frame around the stamped panel and a little rhinestone to dot the lower case “J”. Enjoy!

Card Dimensions:
- Elegant Eggplant cardstock – 5 1/2″ x 8 1/2″ scored at 4 1/4″
- Dazzling Diamonds Glimmer Paper – 4 1/8″ x 5 3/8″
- Whisper White cardstock – 4″ x 5 1/4″
- Elegant Eggplant cardstock – scrap piece, large enough for the “Jolly” thinlit
Supplies Used:


October Specials
From Stampin’ Up!:
Don’t forget to take advantage of the buy three get the fourth FREE DSP sale going on now until October 31, 2016. To see the full list of papers on sale [CLICK HERE]
From Me:
As a thank you for supporting my business, with any order of $35 or more (before shipping and tax) you will receive a FREE Sampler of assorted 6″ x 6″ Designer Series Paper!
Just enter the October Hostess Code 2QQBH6AH when you place your order online. I will send your gift to the address used for your order. If your order is $150 or more DO NOT enter the code. If you enter the code you won’t get your Stampin’ Rewards for FREE goodies and I wouldn’t want you to lose out on those! I will automatically send your gift when the order is placed.
This offer is only available only through Joanne Mulligan, an Independent Stampin’ Up! Demonstrator. At this time I can only accept orders in the United States.
Share this:

Merry Medley Holiday Card
Today’s share features thermal embossing using VersaMark and clear embossing powder. I used Merry Medley for the background and Santa’s Sleigh stamp set and coordinating framelits for the tree and presents. Add a little star with Gold Glimmer paper and some Baker’s Twine and you have a cute little holiday card. Enjoy!

Card Dimensions:
- Cherry Cobbler cardstock – 4 1/4″ x 11″, scored at 5 1/2″
- Garden Green cardstock – scrap piece for the tree (approx 2 1/2″ x 4 1/2″)
- Gold Foil paper – scrap piece for the three gifts (approx 1 1/2″ x 3″)
- Gold Glimmer paper – scrap piece large enough for the little star
Supplies Used:


October Specials
From Stampin’ Up!:
Don’t forget to take advantage of the buy three get the fourth FREE DSP sale going on now until October 31, 2016. To see the full list of papers on sale [CLICK HERE]
From Me:
As a thank you for supporting my business, with any order of $35 or more (before shipping and tax) you will receive a FREE Sampler of assorted 6″ x 6″ Designer Series Paper!
Just enter the October Hostess Code 2QQBH6AH when you place your order online. I will send your gift to the address used for your order. If your order is $150 or more DO NOT enter the code. If you enter the code you won’t get your Stampin’ Rewards for FREE goodies and I wouldn’t want you to lose out on those! I will automatically send your gift when the order is placed.
This offer is only available only through Joanne Mulligan, an Independent Stampin’ Up! Demonstrator. At this time I can only accept orders in the United States.
Share this:

Bleach Technique – Happy Ornament Card
Hello everyone! Today’s share focuses on using regular household bleach to whiten up areas when using a darker cardstock. Every time you use it you never know the effect it will have. In the sample below it doesn’t bleach evenly but almost takes on a look like a globe. To me the lighter parts resemble countries, doesn’t the area under the “HA” and “every” look like Africa? I did go in and add a little Elegant Eggplant to the ribbon and top of the ornament after bleaching. Then for the final touch, a little Wink of Stella over the whole thing, although it is a little hard to see in the picture. Enjoy!

Card Dimensions:
- Elegant Eggplant – 5 1/2″ x 8 1/2″, scored at 4 1/4″
- Gold Foil – 4″ x 5 1/4″
- Elegant Eggplant – 3 3/4″ x 5″
Supplies Used (Not Stampin’ Up!):
- Household bleach (not diluted)
- Old paintbrush
Supplies Used:


October Specials
From Stampin’ Up!:
Don’t forget to take advantage of the buy three get the fourth FREE DSP sale going on now until October 31, 2016. To see the full list of papers on sale [CLICK HERE]
From Me:
As a thank you for supporting my business, with any order of $35 or more (before shipping and tax) you will receive a FREE Sampler of assorted 6″ x 6″ Designer Series Paper!
Just enter the October Hostess Code 2QQBH6AH when you place your order online. I will send your gift to the address used for your order. If your order is $150 or more DO NOT enter the code. If you enter the code you won’t get your Stampin’ Rewards for FREE goodies and I wouldn’t want you to lose out on those! I will automatically send your gift when the order is placed.
This offer is only available only through Joanne Mulligan, an Independent Stampin’ Up! Demonstrator. At this time I can only accept orders in the United States.
To shop with me [CLICK HERE]
Share this:

Inspiration Take Two!
Back in August I posted an entry on where I find inspiration. When I am out and about I look at everything, you never know when an idea will hit you. Last Friday night my husband and I were in Walmart and I walked by a Thanksgiving display and loved the colors. They went so well together I took a picture of the pans and the whole shopping trip I had visions of Island Indigo, Delightful Dijon and Rich Razzleberry dancing around in my head. I couldn’t wait until the weekend so I could make some cards using those colors!!
To see original post on finding inspiration [CLICK HERE]
Here are the pans that were on display:

And here are my creations:


Since it was a Thanksgiving display I decided to go with that same theme using the Paisleys & Posies set and the Give Thanks saying from Suite Seasons. Both were made with a resist technique. Tuesday I will have a video tutorial on this technique so be sure to subscribe to my YouTube channel so you don’t miss it!
Like I tell my customers all the time, you all have inspiration inside of you already and you never know when it will hit you. You just need to be ready when it does!
Supplies Used:


October Specials
From Stampin’ Up!:
Don’t forget to take advantage of the buy three get the fourth FREE DSP sale going on now until October 31, 2016. To see the full list of papers on sale [CLICK HERE]
From Me:
As a thank you for supporting my business, with any order of $35 or more (before shipping and tax) you will receive a FREE Sampler of assorted 6″ x 6″ Designer Series Paper!
Just enter the October Hostess Code 2QQBH6AH when you place your order online. I will send your gift to the address used for your order. If your order is $150 or more DO NOT enter the code. If you enter the code you won’t get your Stampin’ Rewards for FREE goodies and I wouldn’t want you to lose out on those! I will automatically send your gift when the order is placed.
This offer is only available only through Joanne Mulligan, an Independent Stampin’ Up! Demonstrator. At this time I can only accept orders in the United States.
To shop with me [CLICK HERE]
Share this:

Time to Stock Up on Designer Series Paper!
From October 1, 2016 – October 31, 2016 select Designer Series Papers are on sale….buy three get the fourth one for FREE! You can mix and match any way you choose. See below for the designs available during this promotion.
Here are few ideas using the One Sheet Wonder technique. This is a great way to make several cards at once to have on hand or they can make a great gift for someone! Something to think about with the holidays around the corner.
To learn more about One Sheet Wonder and get a template to use in your own designs [CLICK HERE]

Floral Boutique Designer Series Paper #141663

Fruit Stand Designer Series Paper #141660
Choose from the following designs:


To shop now and stock up before the sale ends [CLICK HERE]
Don’t forget! With any order of $35 or more (before shipping and tax) you will receive a FREE Sampler of assorted 6″ x 6″ Designer Series Paper! Just enter the October Hostess Code 2QQBH6AH when you place your order online. I will send your gift to the address used for your order. If your order is $150 or more DO NOT enter the code. I will automatically send your gift when the order is placed.
This offer is only available only through Joanne Mulligan, an Independent Stampin’ Up! Demonstrator. At this time I can only accept orders in the United States.
Share this:

Let’s Do Some Embossing! Featuring Merriest Wishes and Merry Tags
Today’s share highlights both thermal (heat) embossing and dry embossing. The card features the Pine Bough Textured Impressions Embossing Folder, Merriest Wishes stamp set and the coordinating framelits, Merry Tags which can be purchased separately or as a bundle. Enjoy!

[Click here to learn how to thermal (heat) emboss]
Card Dimensions:
- Whisper White Thick cardstock – 5 1/2″ x 8 1/2″, scored at 4 1/4″
- Garden Green cardstock – 4 1/8″ x 5 3/8″
- Whisper White cardstock – 4″ x 5 1/4″
- Garden Green cardstock – 2 1/2″ x 2 1/2″ (for ornament)
- Gold Foil – 2 1/2″ x 2 1/2″
- Gold Bakers Twine – 2 pieces approx 9″ each
Supplies Used:


Share this:

Pear Card using the Fruit Stand Suite

As summer nears an end, I am trying so hard to hold onto the warm weather, long days, and the delicious fresh fruits and veggies this season offers before winter sets in. This card features a yummy pear and is inked using sponge daubers to get nice shading and dimension that is shown in the pears of the Fruit Stand Designer Series Paper. Easy technique that gives amazing results. Enjoy!

Card Dimensions:
- Pear Pizzazz card base – 4 1/4″ x 11″ scored at 5 1/2″
- Fruit Stand DSP – Daffodil Delight with Polka Dots – 4″ x 5 1/4″
- Fruit Stand DSP – Pears – 3 1/4″ x 4 1/2″
- Pear Pizzazz – 3 3/8″ x 4 5/8″
- Whisper White – 2 1/4″ x 3 1/4″
Suppplies Used:


Share this:

How Do I Use That?

When you are a new stamper you can get easily overwhelmed with all the stamps, accessories and tools on the market. I decided I wanted to do a series of videos showing how to use the different tools offered by Stampin’ Up! that can help all stampers no matter where you are on your stamping journey.
The first one I did showcases the Aqua Painters. I chose this tool because as you get to know me and my stamping style I am a HUGE fan of watercolor. I use Aqua Painters all the time, instead of explaining how to use them everytime I watercolor I will provide a link in that post so you can watch the video if you choose to.
Many of you seasoned stampers will know how to use the tools, but I may share a tip or two that you didn’t know. So I encourage to take a peek, they are pretty short since I don’t get into card specifics I concentrate on the tool or accessory highlighted on that video.
I won’t be posting separate blog posts each time a new product tutorial is published. If you don’t want to miss any of them please go to my YouTube channel and subscribe. You will be notified each time a new video is available. I hope this series helps you and you have much success in all your creative projects!
Thank you for stopping by and enjoy this series!
Happy Stamping!
~Jo

