
Welcome back to the final installment of my five part series featuring the Adoring Hearts Bundle and the Thoughtful Moments Embossing folder!! As promised I decided to really change up the Valentine’s Day/Love theme and go in a completely different direction. Embracing my Celtic heritage, I wanted to make a St. Patrick’s Day card This really shows how you can get a lot of mileage out of this set.
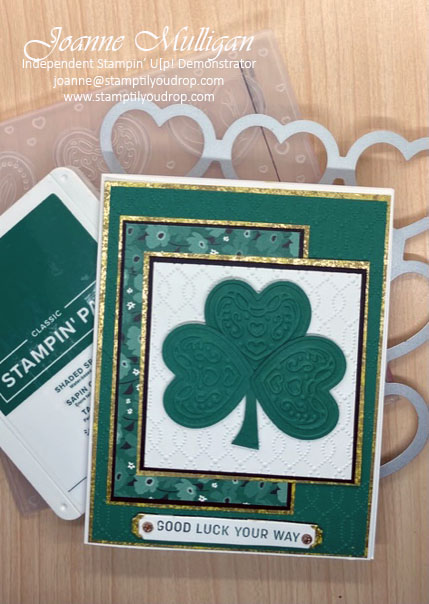
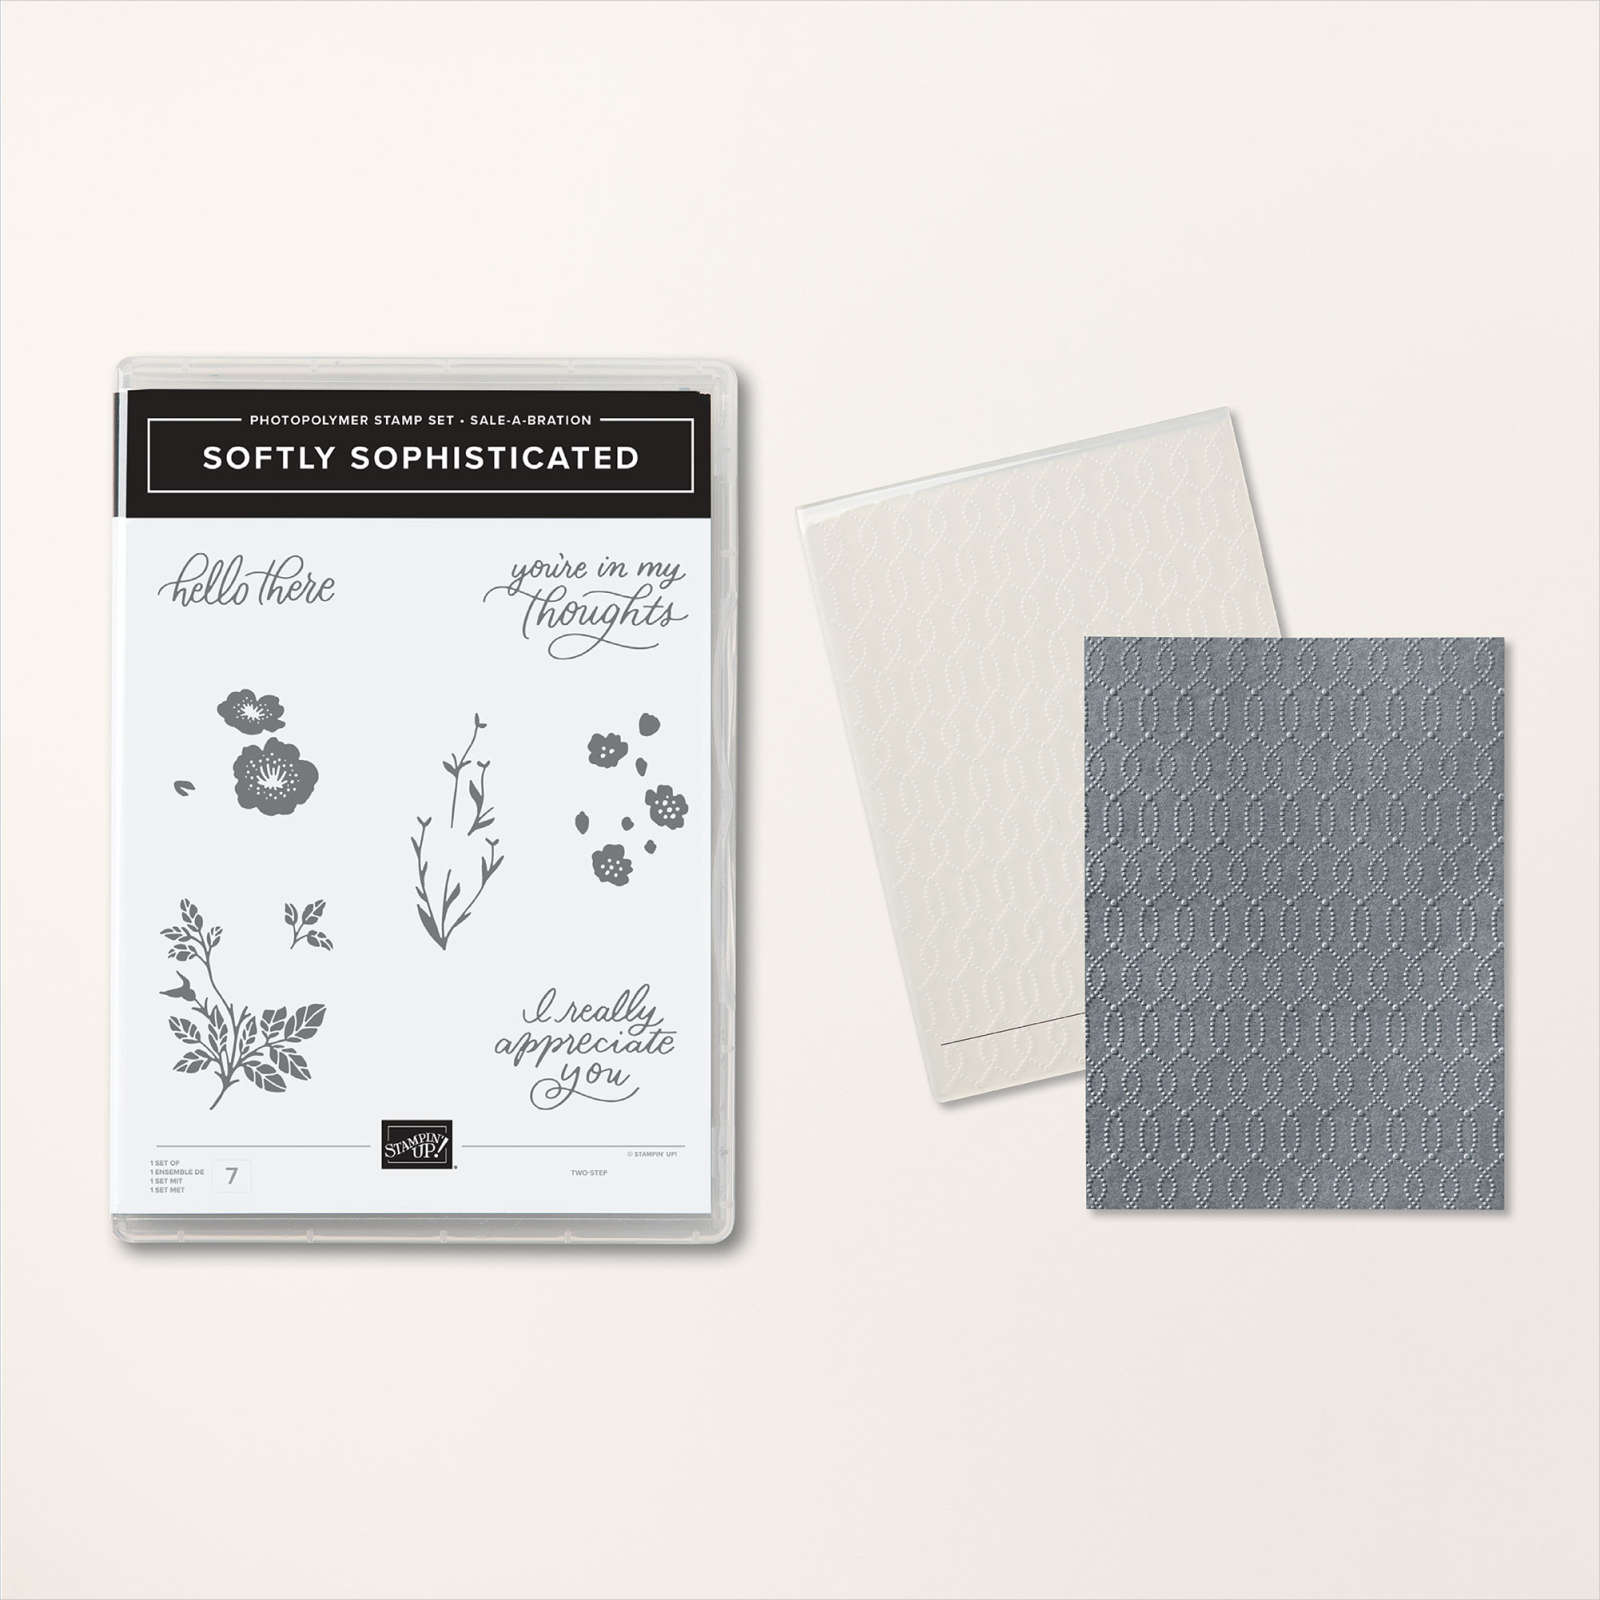
Featuring white, green and gold this card is a fun way to show your Irish pride. After all,isn’t everyone Irish on St. Patrick’s Day? This card is perfect for an intermediate to advanced stamper. I used the Sunny Days DSP and the Softly Sophisticated embossing folder from Sale-A-Bration and the Adoring Hearts Hybrid Folder for the Shamrock.
Bonus: You can get this paper for FREE if you purchase the Adoring Hearts Bundle during Sale-A Bration. Retail amount $53.00 USD Item #162570. If you love the folder it can be yours with a $100 purchase. You will get the Softly Sophisticated stamp set and embossing folder for FREE.
Supplies Used:


New releases for Sale-A-Bration! As if you don’t have great product choices already, Stampin’ Up! has give you more products to choose from!

Let me know if you have any questions!
Happy Stamping!
Joanne

~Making the world a happier place, one card at a time!
Share this:

Love is in the Air Part Four!
Welcome back to my five part series featuring the Adoring Hearts Bundle and the Thoughtful Moments Embossing folder!! Be sure to check back this weekend for a very special card!!
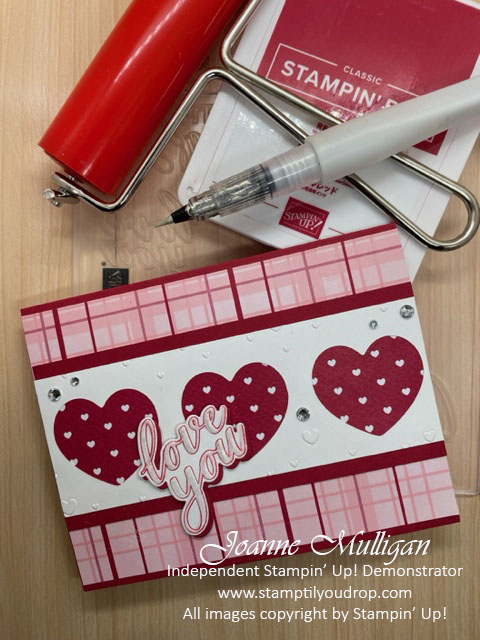
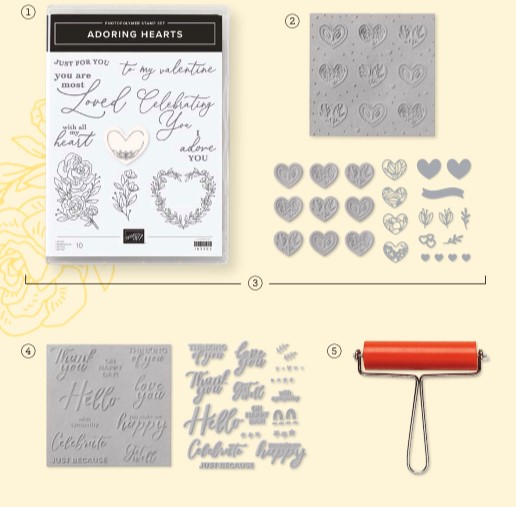
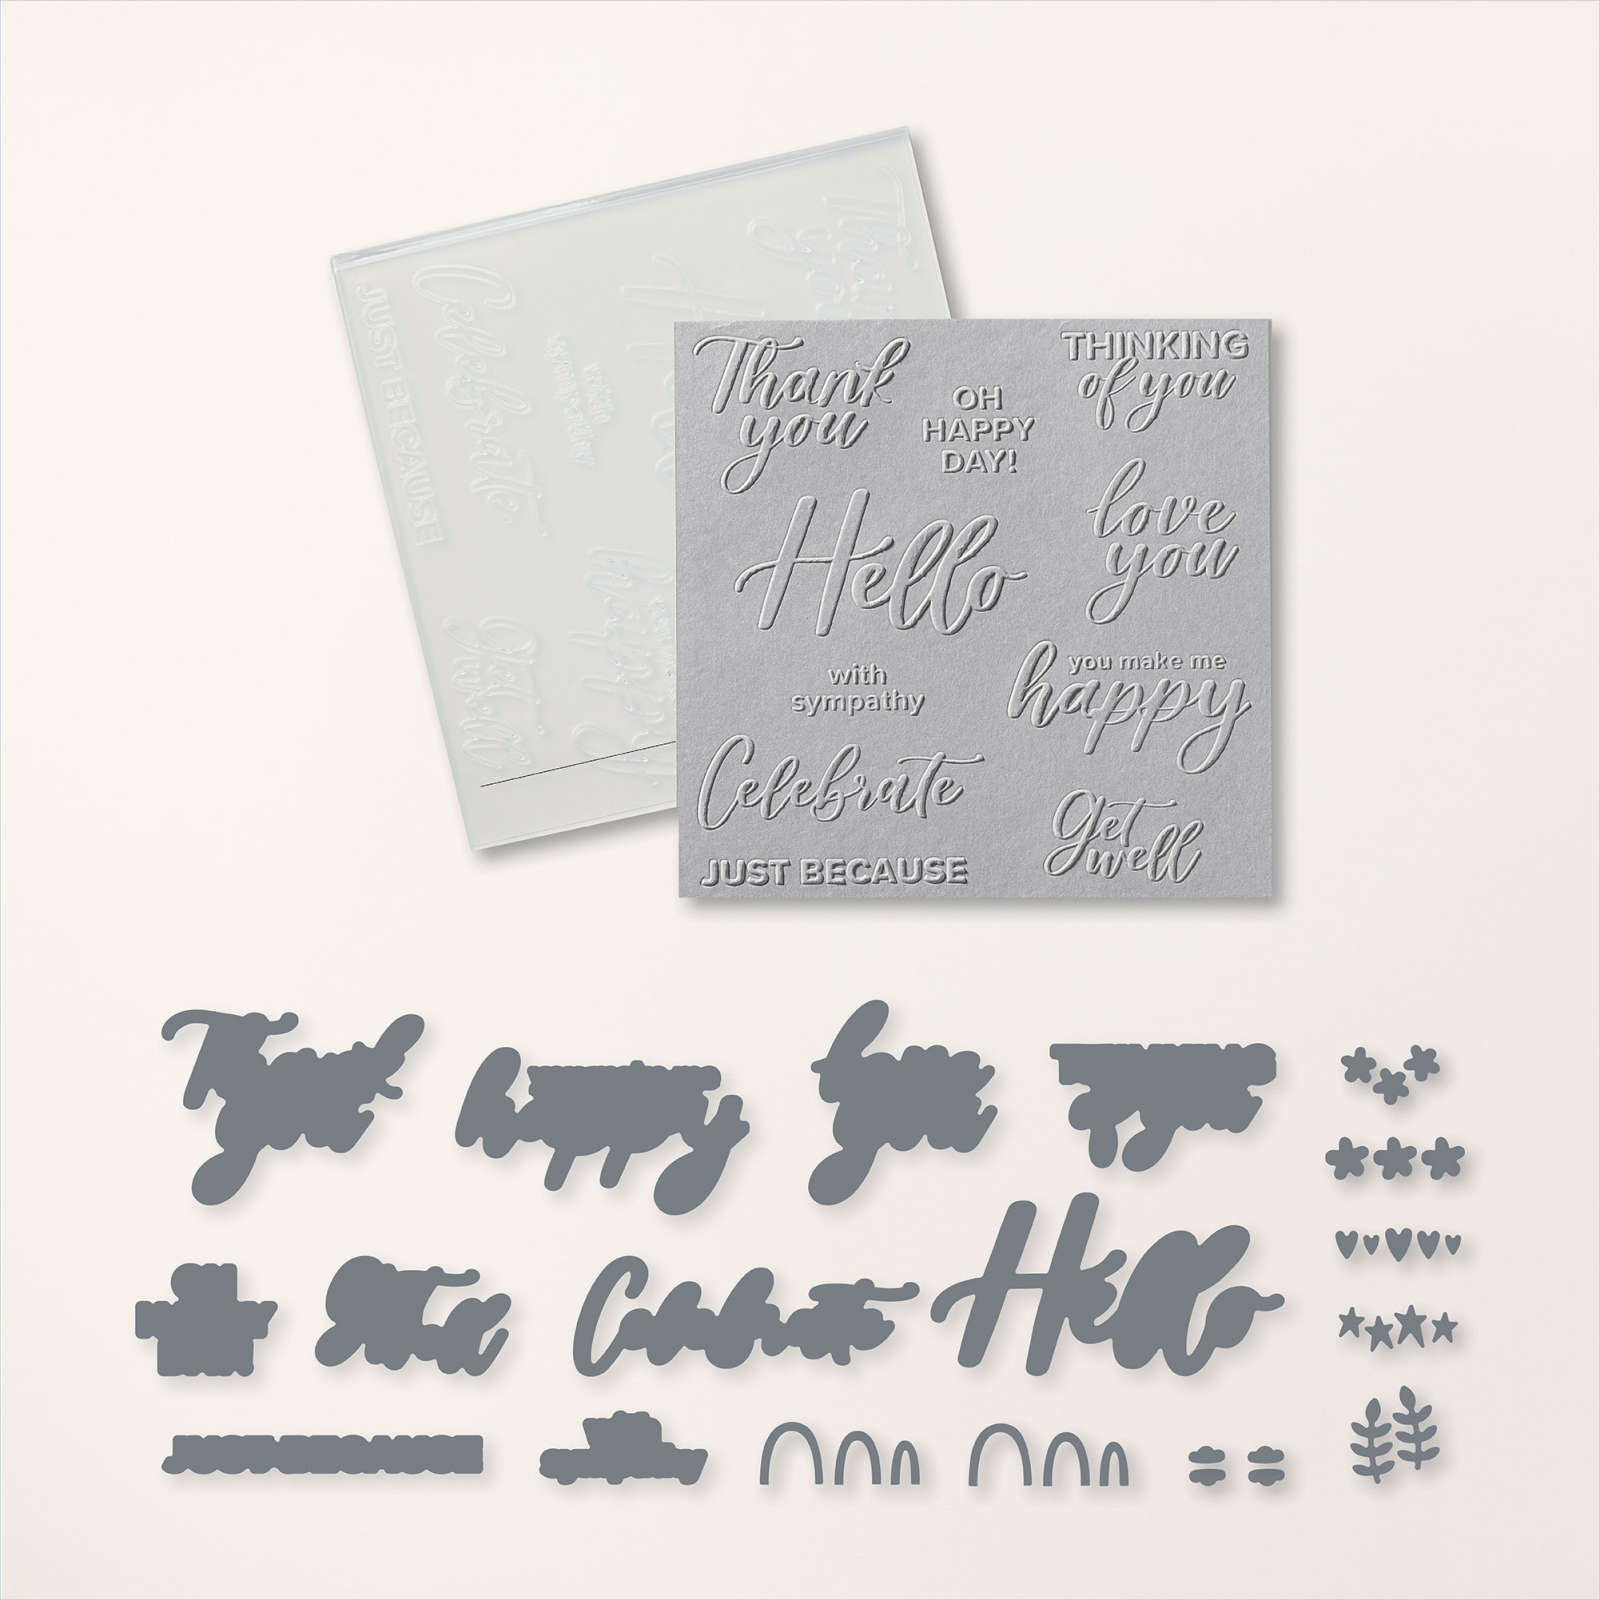
Today’s card showcases all the products shown below plus the Most Adored Designer Series Paper (“DSP”). I have to tell you that I am absolutely in LOVE with the hybrid embossing folders!!
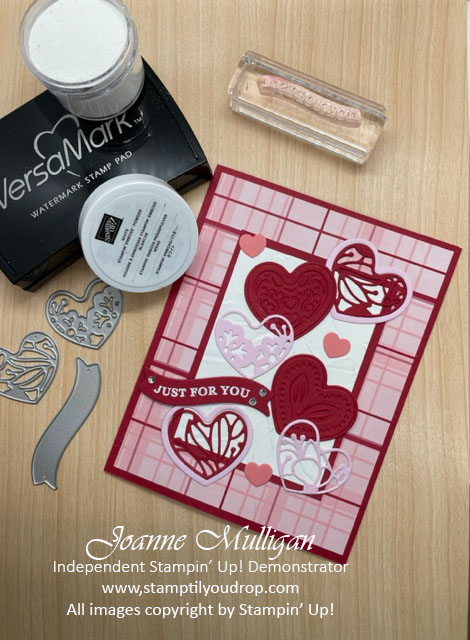
This card is perfect for an intermediate to advanced stamper. I used the Real Red DSP with little white hearts as a peek-a-boo effect with the cut-out hearts and the pretty plaid DSP . Of course there is some bling with Wink of Stella and a few rhinestones.
Bonus: You can get this paper for FREE if you purchase the Adoring Hearts Bundle during Sale-A Bration. Retail amount $53.00 USD Item #162570.
Now how did I create this adorable card? Well here you go………
Hope you enjoyed the video, it’s the first one I’ve done in quite a few years. I am having a lot of fun getting back into my website and sharing my cards and videos. Thank you for coming on this journey with me!!
Supplies Used:


New releases for Sale-A-Bration! As if you don’t have great product choices already, Stampin’ Up! has give you more products to choose from!
Let me know if you have any questions!
Happy Stamping!
Joanne
~Making the world a happier place, one card at a time!
Share this:

Love is in the Air Part Three!
Only 10 more days until Valentine’s Day so another card idea using the Adoring Hearts stamp set and Hybrid Embossing Folder plus the Most Adored Designer Series Paper. Check back later in the week when I have a video showing how to use the brayer, Adoring Hearts Bundle and the Thoughtful Moments Hybrid Embossing Folder.
Today’s card showcases the Adoring Hearts Embossing folder. I really love how you can quickly cut and emboss at the same time. Bonus if you are only using a few hearts, you will have several already cut to use on future projects. TIP: I keep all my extra die cuts I haven’t used in a large plastic container and my scraps in a plastic shoe box. When I need an extra doodad or a small piece of cardstock for a saying I will have one already cut.
This card is perfect for an advanced stamper. I used the pretty plaid for the Most Adored Designer Series Paper. I then cut several hearts using the Hybrid Embossing Folder and other dies in the bundle. It is in Bubble Bath, Real Red and white which are traditional Valentine’s Day colors.
Bonus: You can get this paper for FREE if you purchase the Adoring Hearts Bundle during Sale-A Bration. Retail amount $53.00 USD Item #162570.
Now how did I create the cut embossed hearts and the pretty filigree hearts with heart frames? I will be happy to share it with you my friends, and it all revolves around the hybrid folder!
First you want to place the nine heart die inside the embossing folder. You will notice how the die fits right over the hearts and kind of “locks” in place
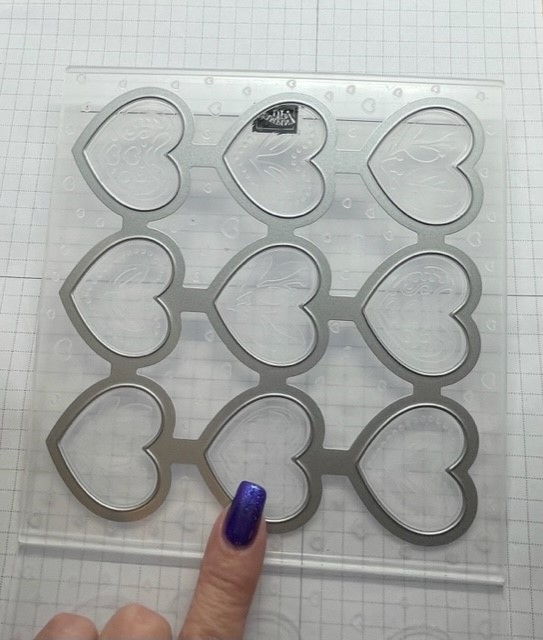
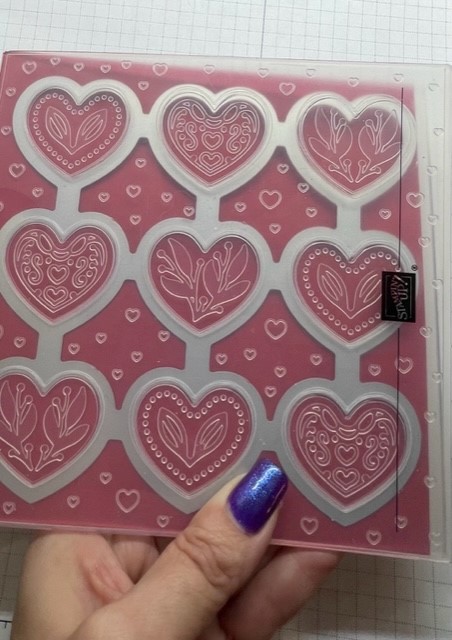
Next you will add your cardstock. I cut mine in a 6″ x 6″ square so I have extras. Now run it through your die cut machine. Bonus: Not only will you have nine little embossed hearts but if you look closely at folder you will have nine open hearts with tiny embossed hearts all around. Later in the week I will show you what you can do with this extra piece! The sandwich for the folder is base plate, embossing folder and the gray plate – same as when using a 3D embossing folder.
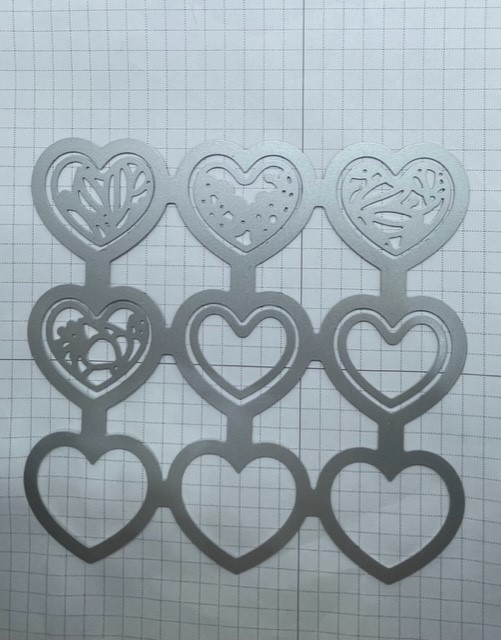
Once you have cut out your embossed hearts its time to cut the little hearts and frames. So break out that nine piece heart die. Place the small filigree hearts and smaller hearts inside the open hearts as shown and run through your die cut machine. Guess what? More hearts to use on future cards!
Supplies Used:


New releases for Sale-A-Bration! As if you don’t have great product choices already, Stampin’ Up! has give you more products to choose from!
Let me know if you have any questions!
Happy Stamping!
Joanne
~Making the world a happier place, one card at a time!
Share this:

Love is in the Air Part Two!
Here are some more ideas using the Adoring Hearts Hybrid Embossing Folder and the Most Adored Designer Series Paper. Check back all week when I will be showcasing different cards using various techniques for different levels of stampers.
Like I said in my weekend post this stamp set and coordinating hybrid embossing folder aren’t just for Valentine’s Day, they can be used for wedding, anniversary, and more! Today I’m going to use a different layout and showcase three cards using the same design but changing the words for different occasions.
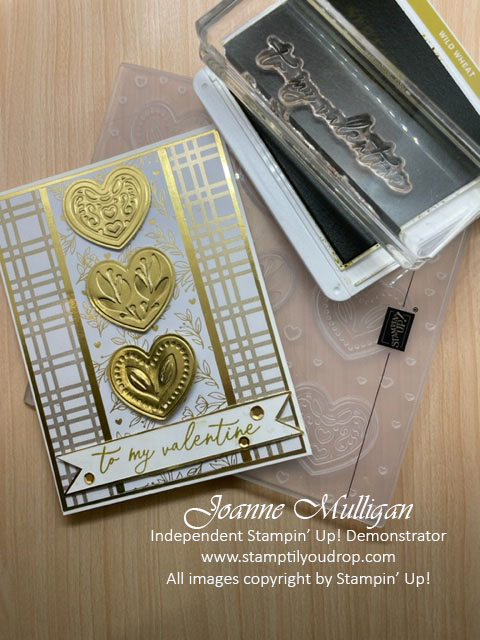
This card is perfect for an intermediate to advanced stamper. It features the a white and gold theme that is extremely elegant and perfect for your favorite valentine! The card really showcases the beautiful Most Adored Designer Series Paper with the shiny gold accents. Bonus: You can get this paper for FREE if you purchase the Adoring Hearts Bundle during Sale-A Bration. Retail amount $53.00 USD Item #162570.
Some of you may be asking what exactly is a hybrid embossing folder. Well let me fill you in on this fun little accessory. It is a 3D embossing folder but is also comes with a large die that fits ever so nicely into the folder so you can cut and emboss at the same time! When that happens you get the little gold hearts that I placed on my card. Such a cool stamping trick!
Later on this week I will be showing you how to use a hybrid folder with ink and a brayer, so stay tuned!!
Here are a few other ideas for using this versatile set to get more bang for your stamping dollar!
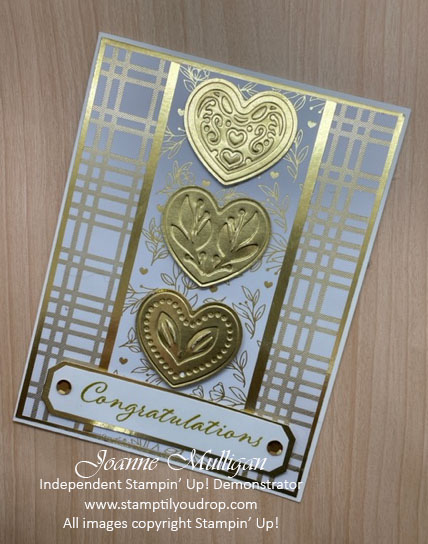
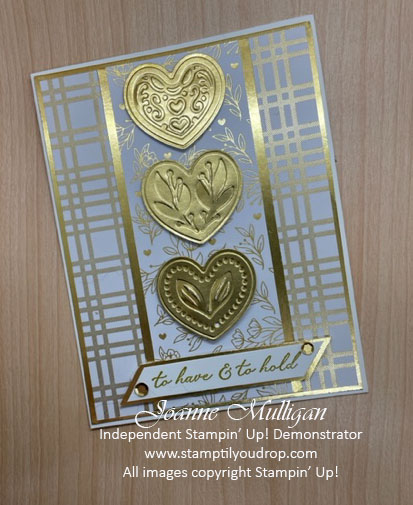
Now what couple wouldn’t love these cards, whether they are just starting out or hitting a milestone anniversary!
Supplies Used:


Let me know if you have any questions!
Happy Stamping!
Joanne
~Making the world a happier place, one card at a time!
Share this:

Oh Bee-Hive!

One of my favorite sets in the 2020 January – June Mini Catalog is Honey Bee. It coordinates with the Detailed Bees dies and will be one of the sets retiring on June 2, 2020. The Golden Honey DSP was a Sale-A-Bration gift at the $50 level and is no longer available but there is still a way to receive a pack of this gorgeous paper. See the contest below for all the details!
I didn’t stamp too much on this card because I wanted the detail in the DSP to showcase the card. Also I didn’t use the dies so it is perfect for a beginning or casual stamper. To step it up you could die cut the bee on the front and attach with dimensionals to give it some depth.

For the card base I didn’t use a full piece of cardstock. When closed it gives the illusion of a full card but when you open the flap you have the greeting hiding behind the bee and another layer of DSP with ribbon so the inside is as pretty as the front.

Card Dimensions:
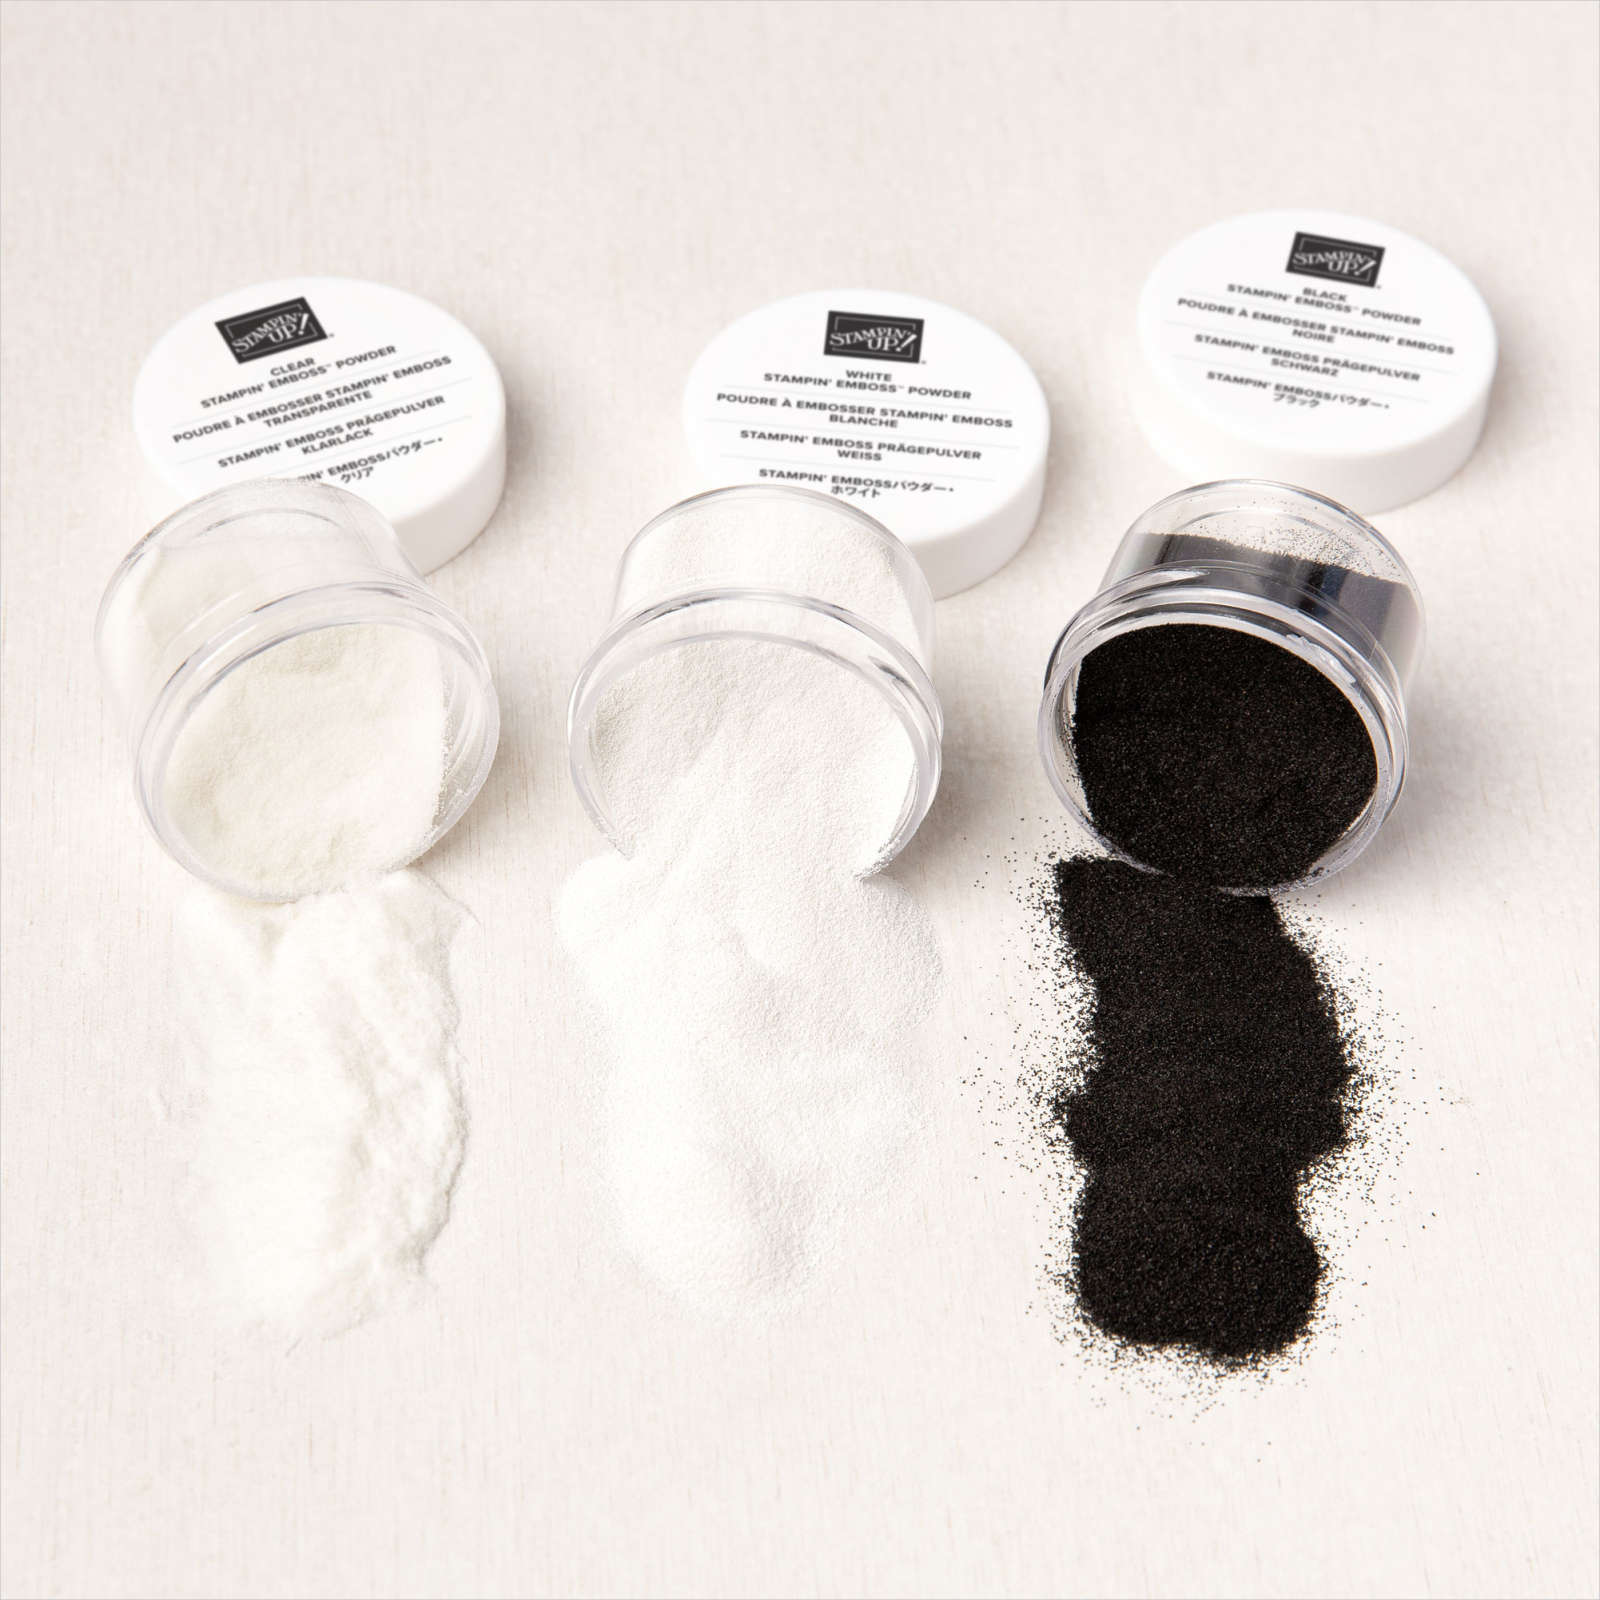
- Basic Black cardstock – 5 1/2″ x 6 3/8″, score at 4 1/4″
- Whisper White cardstock 2 1/2″ x 2 1/2″ – cut two
- Gold Foil – 2″ x 5 3/8″ and 2 5/8″ x 2 5/8″
- Black Foil – 2 5/8″ x 2 5/8″
- Black & Gold Honeycomb DSP 1 7/8″ x 5 1/4″
- Bee and flower DSP 4″ x 5 1/4″
- Gold metallic-edge ribbon 5″
Directions:
- Stamp the bee on a small Whisper White square using Black Stazon ink with the greeting above. Color the bee body with a Crushed Curry Stampin’ Write marker. Add some shimmer to the wings with Wink of Stella.
- Stamp the flowers on the other Whisper White square again using the Stazon ink. Color with the Crushed Curry marker.
- To create the coordinating black ribbon, lay the ribbon on your grid paper, place a sheet of cardboard behind it. Taking a Basic Black blend color the Gold Edged ribbon, set aside to dry. Since the Blends are alcohol based they dry pretty quick. This works for any light colored ribbon, using this technique you can always have ribbon to match your projects!
- Attach the honeycomb DSP to the gold foil panel and then place on the flap on the left of the card front
- Attach the bee panel to the gold foil square then attach to the flap in the center as shown, taking care to only put adhesive on the RIGHT side. That way the card will open.
- Wrap the ribbon around the bee and floral DSP attaching to the panel in the back. Attach entire panel to the inside of the card.
- Adhere the inside greeting to the black foil square then to the center of the card, making sure the outer greeting completely covers this panel. This will hide the “surprise” for the recipient.
Try using the ribbon technique and fold with other stamp sets and Designer Series Paper, I would love to see what you come up with! Send me your creations and I will display them in my customer gallery!
Supplies Used:


Additional Supplies:


How to win a package of the Golden Honey DSP
- purchase the Honey Bee Bundle or the Honey Bee Stamp Set and
- use Hostess code DJPSQ474 when placing your order and
- you will be placed into a drawing to win a package of Golden Honey DSP!
BONUS: When using the Hostess Code DJPQ474 and placing an order $35 or more you will receive a DSP sampler pack as a free gift as a thank you for supporting my business!
The winner will be announced on June 3rd and the DSP pack will be shipped to the address on your order. Be sure to place your order soon, retiring products are only available until June 2, 2020 or while supplies last.

SHOP WITH JO
If you have any questions on the project featured, please let me know. I would be happy to help!
Happy stamping!
Jo
~Making the world a happier place, one card at a time
Share this:

Designer Series Paper Sale – Featuring Magnolia Lane DSP
 There are only a few days left to take advantage of the annual Designer Series Paper Sale (“DSP”)!! It is going on right now and ends on September 30, 2019. For every three packs of select DSP you purchase, you get one pack for FREE. Time to stock up on your favorites and use that gorgeous DSP in all your creations!
Designer Series Paper included in Buy 3, Get 1 Free offer


One of my favorites, Magnolia Lane, is included in this sale.
When I was growing up my mother had the most gorgeous magnolia tree in the yard. I always loved how it would blossom in the spring with the delicate pink and white blooms. She has been gone eighteen years now but when I saw the Magnolia Lane Suite in the catalog it instantly brought back those fond memories and it was number one on my wish list.
The suite consists of; the Good Morning Magnolia stamp set, Magnolia Memory Dies, Magnolia 3D Embossing Folder, Magnolia Lane Designer Series Paper, Magnolia Lane Large Specialty Memories & More cards and envelopes, the Magnolia Lane Memories & More card pack, Magnolia Lane Ribbon Combo pack, Magnolia Lane Cork Embellishments, and So Saffron Stampin’ Blends combo pack.
All these items can be purchased separately, the stamp set and dies as a bundle (save 10%) or new this year get the entire suite with just one item number and still save 10% on the stamp set and dies!


Don’t forget the sale ends on Monday September 30th!
Additional Supplies Used:


Share this:

Happiness Blooms Suite
It’s been some time since I have posted and I am excited to be back sharing some projects with you! I finally had some time to play this weekend and once I got started with this suite it was hard to stop!!

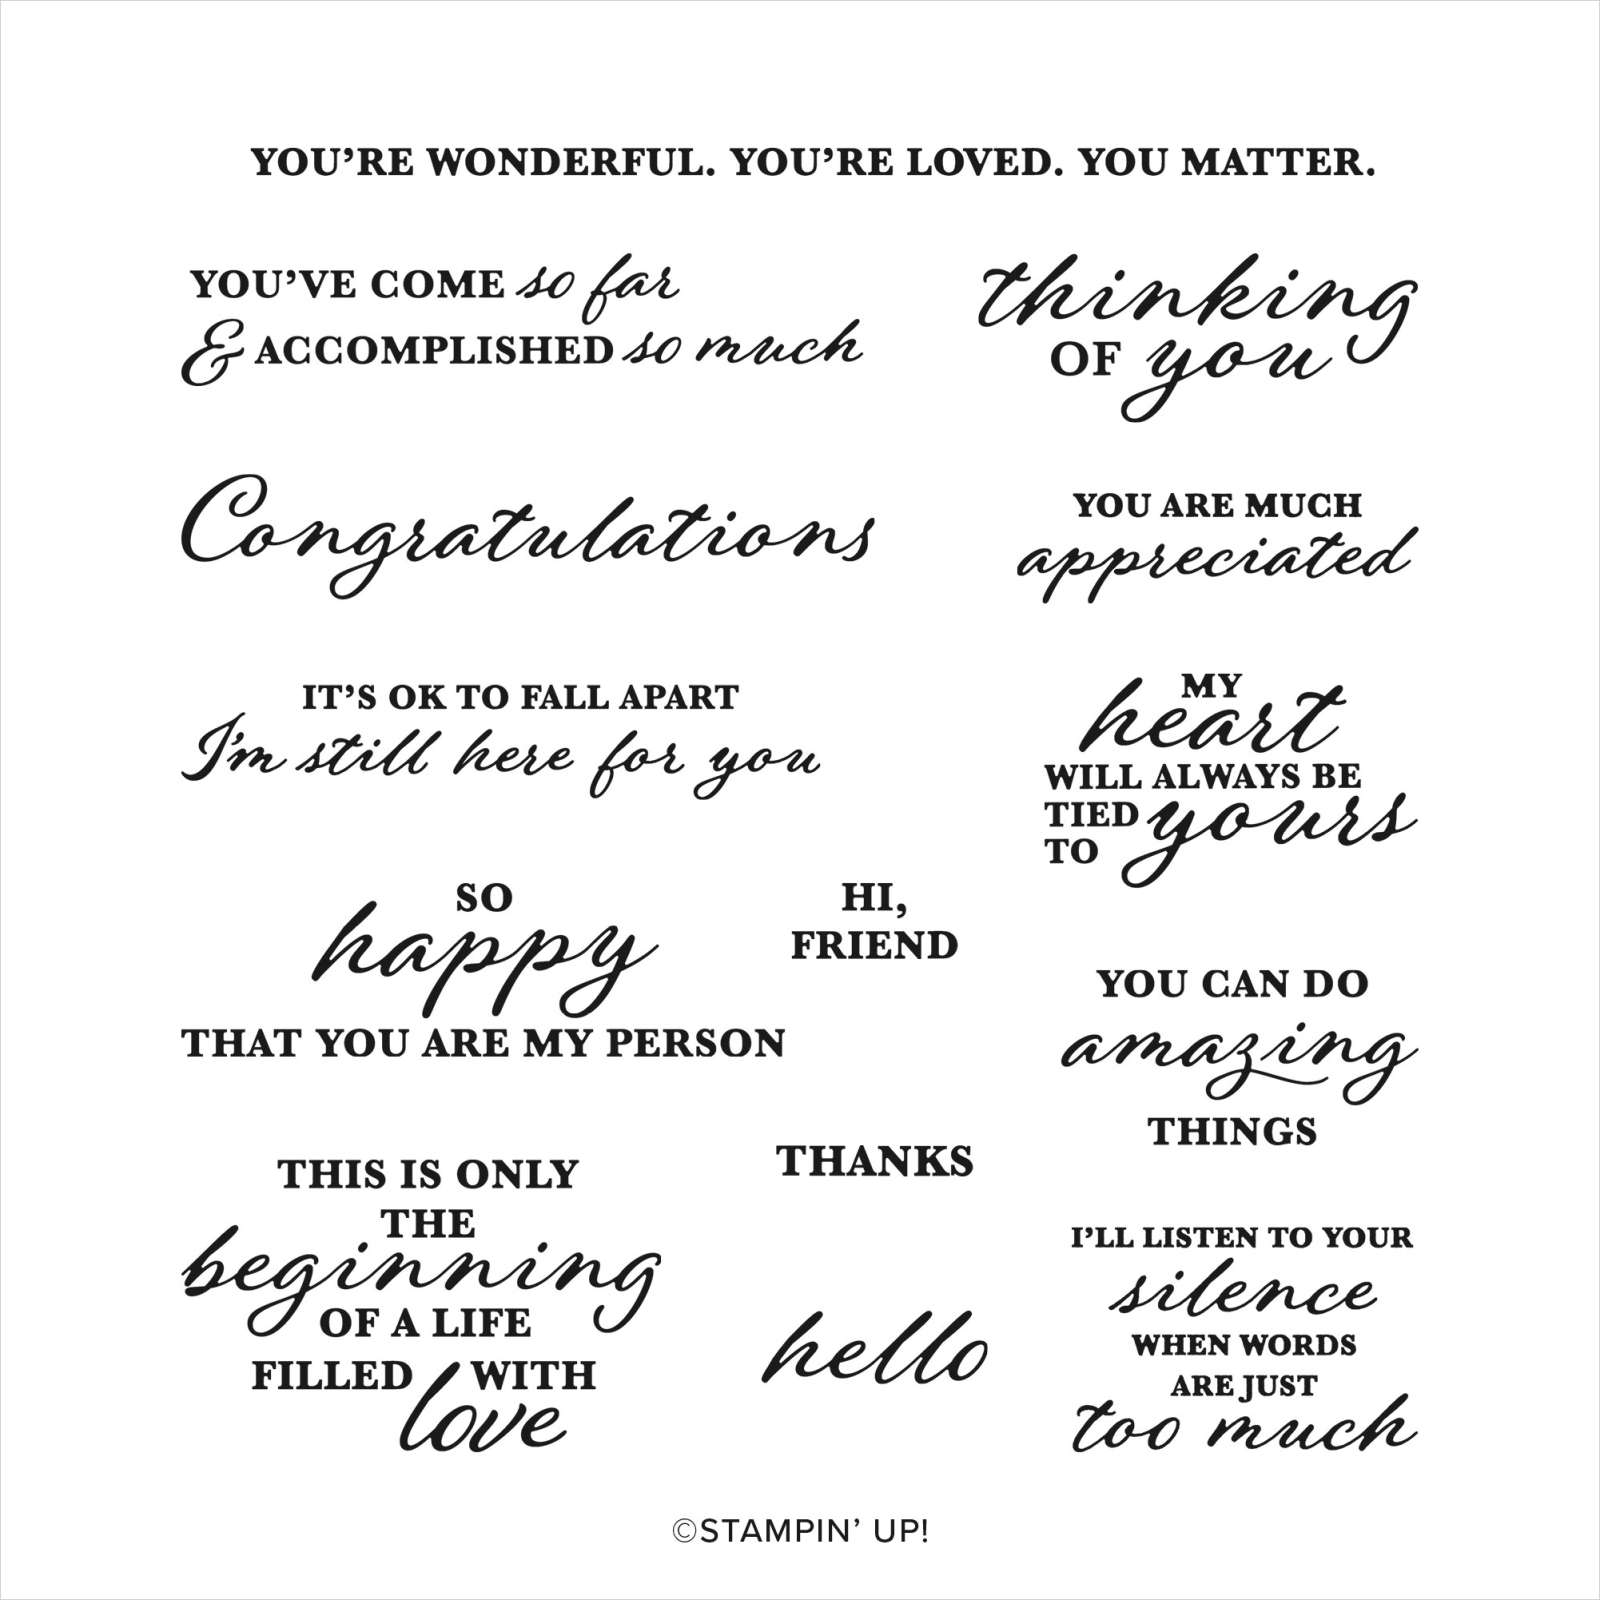
Cards made using the stamp sets Bloom by Bloom from the 2019 Occasions catalog and Part of My Story from the 2019 Sale-A-Bration Catalog
The minute I saw this suite at OnStage in Orlando I knew I had to have it. I just love the bold images and bright colors, it just makes me happy looking at it! But I think my favorite thing about this set has to be how all the products work so well together, the possibilities are bound only by your imagination.
This suite not only contains a 17 piece photopolymer set and 4 mini punches, but there is coordinating Designer Series Paper (DSP), satin ribbon, enamel dots, a textured inpressions embossing folder, cardstock pack, and a Memories & More card pack with matching cards and envelopes! This suite has so many pieces it takes up a full three pages in the 2019 Occasions Catalog. Although the set doesn’t have any sayings, I found the exclusive Sale-A-Bration set, Part of My Story worked really well. As a bonus, during Sale-A-Bration (SAB) spend $50 and you can get the Part of My Story set for free!
Lets get started!

First up I used a sheet of Happiness Blooms DSP, matching Night of Navy and Pineapple Punch cardstock, Pineapple Punch 1/8″ grosgrain ribbon, Happiness Blooms enamel dots in Pineapple Punch and my go to Layering Oval framelits. The saying is stamped using Call Me Clover ink.

This card shows some versatility to the set. I started with another sheet of the DSP, this time in stripes. Night of Navy is the card base and a layer behind the Whisper White piece making the stamped images really pop. For the butterfly I used the smallest flower and Calypso Coral ink to make wings. For the body I used the Dark Night of Navy blend and drew it freehand, adding little antennae. A little epoxy heart was placed over the inked heart to give it a little shine. This card is very easy to make and doesn’t require any special tools, perfect for a beginning stamper.

This card is stunning in person, since it showcases the Grapefruit Grove Foil Sheet, available only during SAB with a $50 purchase. It has a holographic look and is a must have for one of your free SAB items! I wish I could have really captured the beautiful colors in the photo.
The foil sheet is embossed with the Dot to Dot Textured Impressions Embossing folder and paired with some DSP. A piece of Calypso Coral 3/8″ Satin Ribbon covers the seam and adds another layer of sheen to the card. Call Me Clover and Calypso Coral are the cardsock colors used along with Whisper White. Inks used were Grapefruit Grove for the flower, Call Me Clover for the stem and Night of Navy for the little dots to match the DSP.

Cards made using the Happiness Blooms Memories & More card pack and matching Memories & More Cards & Envelopes
After I played only with the the set and some of the products from the suite I really wanted to dive into the whole suite. You can make some really simple notecards and full sized cards using the Happiness Blooms Memories & Blooms Card Pack and the coordinating Happiness Blooms Memories and More Cards & Envelopes.
If you aren’t sure what a card pack is, the pack contains 50 double sided cards (2 each of 25 designs) in 3″ x 4″ and 4″ x 6″ sizes, 6 single sided 4″ x 6″ specialty cards (the designs are all embossed!!) and 4 coordinating sticker sheets. The matching cards and envelopes have small and large cards that fit the 3″ x 4″ and 4″ x 6″ cards perfectly. One side is Night of Navy and the inside is white. The envelopes are white and have Night of Navy stripes along the inside flap.
These are perfect for when you need a card but are short on time or just starting out with paper crafting and have limited supplies. There is no stamping needed just attach one of the pre-printed cards to the front of the matching card and voila, a card ready to use!! You can leave them as is or step them up a notch adding some embellishments such as stickers from the card pack or from the suite.

This is a perfect example of just attaching the card to the front of a little notecard like the card on the left. It looks great as it is, the saying is already pre-printed and has a coordinating border. If you have a few more minutes go ahead and step it up a bit. I added a few enamel dots to the center of several flowers, then I punched a matching flower using one of the Bitty Blooms mini punches and Lovely Lipstick cardstock. I added an enamel dot to match the ones on the card and raised it with a mini dimensional.

For these two I added “Time to Celebrate”, one of the stickers from the card pack, to the Congratulations card with mini dimesionals and a few enamel dots here and there. On the little Love and Laughter notecard, I kept it simple with just a small Pineapple Punch 1/8″ grosgrain ribbon bow.

On these two I added stickers from the card pack to both cards. Everything is so beautifully coordinated it really makes these cards easy. To give them a little dimension the flowers were raised with mini dimensionals.

These two were very simple. Since the backgrounds were so pretty I only wanted add a small embellishment. To each I added flower stickers from the card pack and to make them pop some a little enamel dot in the center.

To the Thinking of You card on the left I added the little strand of circles, another sticker from the pack and three sizes of enamel dots. To the Love & Happiness card I colored two of the small Epoxy Heart Droplets with a Dark Flirty Flamingo Blend. Since the marker is alcohol based you can color these embellishments to match your project or leave as is and it won’t wipe off.

These two cards I stepped up a little bit more. For the Happy Birthday card I punched the small flowers from a sheet in the Happiness Blooms DSP pack and added enamel dots to the center of each. Then each was attached to the card with a mini dimensional and I added a bow made from two pieces of Night of Navy Baker’s Twine. The notecard on the right uses stickers from the pack including “Thank You”, flowers and leaves. Again they were attached to the card using mini dimensionals.

This last card really steps it up. I used one of the specialty cards from the pack that is embossed. It’s really hard to see the embossed flowers in this picture but the one below really shows how shiny they are.
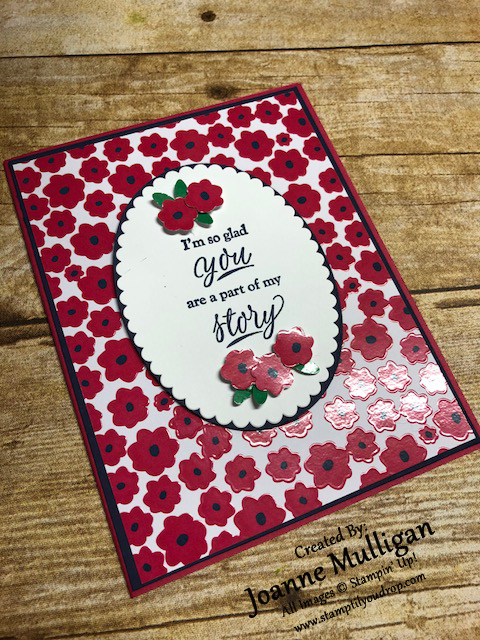
Instead of using the coordinating cards from the suite I used a Lovely Lipstick cardbase and a layer of Night of Navy behind the embossed flower card. I cut an oval piece from the center of the floral panel before attaching to the Night of Navy panel since this will be covered by the saying. This really gives you more out of your specialty paper. From the piece I cut out, I punched the little flowers out using one of the Bitty Blooms punches. To get the leaves I cut a small narrow strip from one of the other specialty cards that had embossed Call Me Clover circles and punched little leaves using the leaf punch from the Bitty Blooms punch pack. The saying is from Part of My Story and I stamped it in Night of Navy ink on a large scallop of Whisper White cardstock. This was mounted to an oval of Night of Navy and attached to the card using dimensionals.
I hope you have as much fun with this set as I did this weekend!
If you purchase the entire suite, add a pack of mini dimensionals and a roll of ribbon you will get to $100.00 giving you both the Foil Sheets and the Part of My Story stamp set for FREE!
To learn about Sale-A-Bration and see other products you can earn CLICK HERE.
Products Used:


If you would like to get a notification each time I post a project share, specials from Stampin’ Up! or myself, class schedules or video tutorials, please make sure you click “Follow By Email” at the top of this post. That way you won’t miss a thing!
As always, please feel free to share any post on Pinterest or Facebook! If you are interested in attending classes or any of my all day events be sure to visit my events page for a current schedule.
Share this:

In the jungle..the mighty jungle..
I bet you now have the classic song by the The Tokens stuck in your head right now, I know I do. While I type this I’ll just be singing a-weema- weh, a weema weh,a weema-weh……

I am loving the Animal Outing set right now, not only does it have the cutest images but it just screams out to be colored by Stampin’ Blends. This bright cheery card was one of my projects for my stamp club this month and my ladies LOVED it! It features Lemon Lime Twist paired with Smoky Slate and focuses on the little Rhino and his bird friend. And what makes this set even better, I received it for free when I went to OnStage this past April.

It is an easy card perfect for any level stamper. Don’t be intimidated by the Blends, they are super forgiving and easy to use. If you love to color this is the project for you!
Directions:
- You will need Smoky Slate for your card base 5 1/2″ x 8 1/2″, scored at 4 1/4″, a piece of Lemon Lime Twist (4″ x 5 1/4″), a strip of Whisper White (2 1/4″ x 4″), a strip of Animal Expedition Designer Series Paper (2″ x 4″) and a piece of Whisper White cut from the largest Stitched Square framelit.

- Next stamp the rhino image onto the stitched square using Memento Tuxedo Black ink. Hint: When using blends you need to use a dye based ink so the lines don’t blur. And when water coloring you need to use a solvent or archival ink. Just remember opposites attract. When using alcohol to color with use a dye or water based ink and when applying water use a solvent based ink.

- Next you want to color your image using Stampin’ Blends. I used light & dark Crumb Cake for his horn, light and dark Granny Apple Green for the little bird, dark Pineapple Punch for his beak, light and dark Smoky Slate for his body, light Flirty Flamingo for the inside of his ears and light Granny Apple Green for the grass. If you make a mistake and go outside the lines or want to add a highlight you will use the Color Lifter.

- Stamp the greeting on the bottom using Tuxedo Black Memento ink. Stamp the leaves around the edges using Lemon Lime twist ink. Attach the Lemon Lime Twist DSP to the Whisper White strip.

To finish the card adhere DSP strip to the middle of the card using SNAIL and the entire panel to the card base. Finally attach your little rhino to the middle using Stampin’ Dimensionals.

As an added bonus the Animal Expedition is part of the Buy 3, get 1 FREE DSP sale during July!! For more information CLICK HERE.
Supplies Used:


If you would like to get a notification each time I post a project share, specials from Stampin’ Up! or myself, class schedules or video tutorials, please make sure you click “Follow By Email” at the top of this post. That way you won’t miss a thing!
As always, please feel free to share any post on Pinterest or Facebook! If you are interested in attending classes or any of my all day events be sure to visit my events page for a current schedule.
Share this:

It’s Never Too Early to Plan for the Holidays!

I hope everyone is having a wonderful summer, enjoying time with family and friends and creating memories that will last a lifetime. Even though summer is in full swing, before you know it will be time to start creating your holiday cards. And Stampin’ Up! is helping you by releasing a gorgeous set, Carols of Christmas along with the coordinating thinlits Card Front Builder ahead of the unveiling of the 2017 Holiday catalog! It can be purchased separately or save 10% by buying the bundle!
I have just started playing with these and I am really having a great time! There is so much that can be done with this bundle, from a complex card to something quite simple. I think this set will appeal to almost everyone and I put it as a must have for your holiday crafting. You can get a lot of mileage out of the thinlits, they can be used well after the holidays, especially the beautiful frame cut out.
I created this card for our Annual Christmas in July Card Buffet and it was a huge hit! It has a great traditional Christmas look plus it is super easy to put together and replicate in large quantities. Enjoy!

Step by Step Directions and Card Dimensions
For more ideas using this set check out this video from Stampin’ Up!
Supplies Used:


Share this:

Featured Stamp Set – Coffee Cafe

Anyone who knows me really well, knows that I LOVE coffee! There is nothing like the first sip in the morning it makes me instantly happy. I do have a few coffee rules; only hot coffee in the morning no matter the weather and in the afternoon hot if the temperature is below 50 and iced if it is over. There is a slight variation on this if it is raining I have hot in the afternoon no matter the temperature. I know it’s a little quirky but that’s how I roll in the coffee department.
It was no surprise that as soon as I saw the Coffee Cafe stamp set, and the entire Coffee Break Suite it was a must have for me! I really like the sayings as well as the Designer Series Paper (“DSP”) and the super adorable Corrugated Elements.
The colors are very earthy which play nicely on the coffee theme.

It was the first set I chose to really play with when my first order arrived. Here is what I came up with.

First up a little gate fold card. The card base is Pear Pizzazz cardstock 5 1/2″ x 8 1/2″ score at 2 1/8″ and 6 3/8″). I used the polka dot DSP on the front of each panel (1 7/8 x 5 1/4″). Then I stamped the large cup and lid using Early Espresso and the oval saying with Pear Pizzazz on Whisper White cardstock, then each image was cut out using the Coffee Cups Framelits. I also cut the coffee collar from Early Espresso cardstock using the fluted framelit. Next I attached the lid and coffee collar to the cup with a small amount of Multipurpose Liquid Glue. The oval saying was adhered to the oval Corrugated Element and attached using a dimensional. I tied a strand of linen thread around the top then into a small bow. The coffee cup gets attached to the left side only, make sure you only apply adhesive to that side so the card can open and close.
I will be having a video how to on this card once my editor can help me with it. And by editor I mean my daughter. She is a tad busy the next few weeks moving into her first house, they closed on it this past week and are busy cleaning and painting. They thought it best to get this done before all the furniture was moved in. So production is on hold for a little while until she is settled in .

Next I wanted to continue with the polka dot DSP but add a few new elements. The Coffee Cups Framelits come with a teeny tiny coffee cup that fits perfectly on the cups of another sheet paper from the Coffee Break DSP pack. I thought it would be fun having them stacked on top of one anther going along the inside of the card. The card front is slightly smaller than the back allowing the cups to peek through. The Soft Sky card base is 5 1/2″ x 7 1/2″, score at 4 1/4″. I added a strip of the polka dots to the front panel (3″ x 5 1/4″. Next I stamped the cup and lid in Early Espresso on Whisper White cardstock and the saying in Soft Sky, it fits perfectly in the cup! They were cut out using the framelits and attached as in the first card. I took a small strip of burlap ribbon and attached using Tear & Tape adhesive, then the cup was attached on top using dimensionals. Next I cut 5 little cups from the DSP and glued along inside of the card using Multipurpose Liquid Glue. I always try to use odd numbers in my “works of heart”. In high school my art teacher always told us odd numbers are more pleasing to the eye and that rule has stuck with me all these years.

I decided to change-up the DSP for this card. This time I used Early Espresso for the card base (5 1/2 x 8 1/2″ score at 4 1/4), with a Crumb Cake panel (4″ x 5 1/4″) on top of this. I cut the DSP into 2 strips 1 3/4″ x 5″ with a small Early Espresso Strip 1/4″ x 5″, these were attached to the Crumb Cake panel then attached to the card base. I stamped the cup and lid again in Early Espresso but this time on Soft Sky cardstock and cut out with the framelits. The coffee collar was cut this time using the plain framelit not the fluted one. The cup was assembled as done previously and the heart Corrugated Element was added with a dimensional. I stamped the saying on Whisper White cardstock in Crumb Cake then stamped the hearts in Soft Sky using the outline heart stamp and coloring in with the matching Stampin’ Write marker. I added a touch of clear Wink of Stella for some sheen. This was cut out using the Layering Ovals framelits and I cut a matching oval the next size up in Early Espresso, then attached to the card using dimensionals.

I do love the occasional iced latte with whipped cream so that is what inspired this card. I used Garden Green for the card base, standard size 5 1/2″ x 8 1/2″ score at 4 1/4″. I took a Crumb Cake panel (4″ x 5 1/4″) and stamped it using the Burlap Background Stamp in Crumb Cake ink then attached to the card base. Then I took a 2 1/2″ x 4″ piece of DSP and tore the edges. To get the white inside to show tear the paper toward you not away. This was attached to the Crumb Cake panel. Next I stamped the saying on Whisper White using Garden Green ink. I tore the saying out then using a sponge dauber I inked the edges with Soft Suede, this was attached to the DSP using dimensionals. The cup was cut from Crumb Cake and sponged with Soft Suede. I stamped the straw using the small striped stamp on a scrap of Whisper White using Garden Green. With the photopolymer stamps you can line up each section with ease to create one long strip which was then cut with the framelit. The whipped cream was stamped using Crumb Cake and cut out along with the coffee collar in the matching DSP. To give the whipped cream a little something extra I added a little Wink of Stella in clear. After assembling the coffee cup, it was attached to the card with dimensionals.
This card will be featured in a video, as it has many elements that people always ask me about such as getting a clear image with a background stamp and tearing to get those nice feathered edges.

Now to show you the versatility of this set, I made a birthday card with a cupcake using the coffee collar and whipped cream. I also played with my other must have the Embossing Paste! The card base is Early Espresso, 4 1/4″ x 11″ scored at 5 1/2″, on top of this I added a Pear Pizzazz panel (4″ x 5 1/4″). I took a piece of striped DSP (3 3/4″ x 5″) and cut the center using the largest oval framelit from Layering Ovals. I cut another oval from the polka dot DSP, (I told you I loved the polka dot DSP!) and inserted it in the center of the striped panel. Now comes the fun part….I cut whipped cream out of a piece of thick Whisper White cardstock. I took a small amount of the Embossing Paste and put it on my Silicone Craft Sheet with a palette knife. I added a few drops of Early Espresso reinker and mixed it up to make the yummy chocolate frosting, I swear it looked just like real frosting I was very impressed! Then I frosted the little whipped cream piece, just like a real cupcake. While the embossing paste dries pretty quick when used in a thin layer, since this was so thick I hit it with a hairdryer on low to speed drying time. Then using Crumb Cake card stock I cut my cupcake using the fluted coffee collar. I found it a little large so I trimmed it down with my Paper Snips to a perfect cupcake size. The edges were sponged with Soft Suede and a dauber. I cut out the banners using the Duet Banner punch after I stamped the sayings from the Happy Birthday Gorgeous set in Early Espresso ink. These edges were also sponged with Soft Suede ink. Then the banners and cupcake were attached with dimensionals.
Supplies Used:


I hope you enjoyed these projects using the Coffee Break Suite. If you have any questions about any of the featured cards, please let me know I would be happy to help!
If you would like to get a notification each time I post a project share, specials from Stampin’ Up! or myself, class schedules or video tutorials, please make sure you click “Follow By Email” at the top of this post. That way you won’t miss a thing! As always, please feel free to share any post on Pinterest or Facebook!

